Integrations

HubSpot Integration

Connect SalesQL to HubSpot, export your projects as HubSpot lists, and import extra contact fields from a SalesQL download with HubSpot's import tool.

In short

  • Install the app, select the projects to export, click Enable, and log in to HubSpot to sync your SalesQL account.
  • Click Integrate my current contacts to export every contact that matches your filters; projects appear in HubSpot as lists.
  • For information beyond the synced fields, download the contacts from SalesQL and import the file with HubSpot's Import option.

How to sync SalesQL with HubSpot

To sync your SalesQL account with HubSpot, please follow these steps:

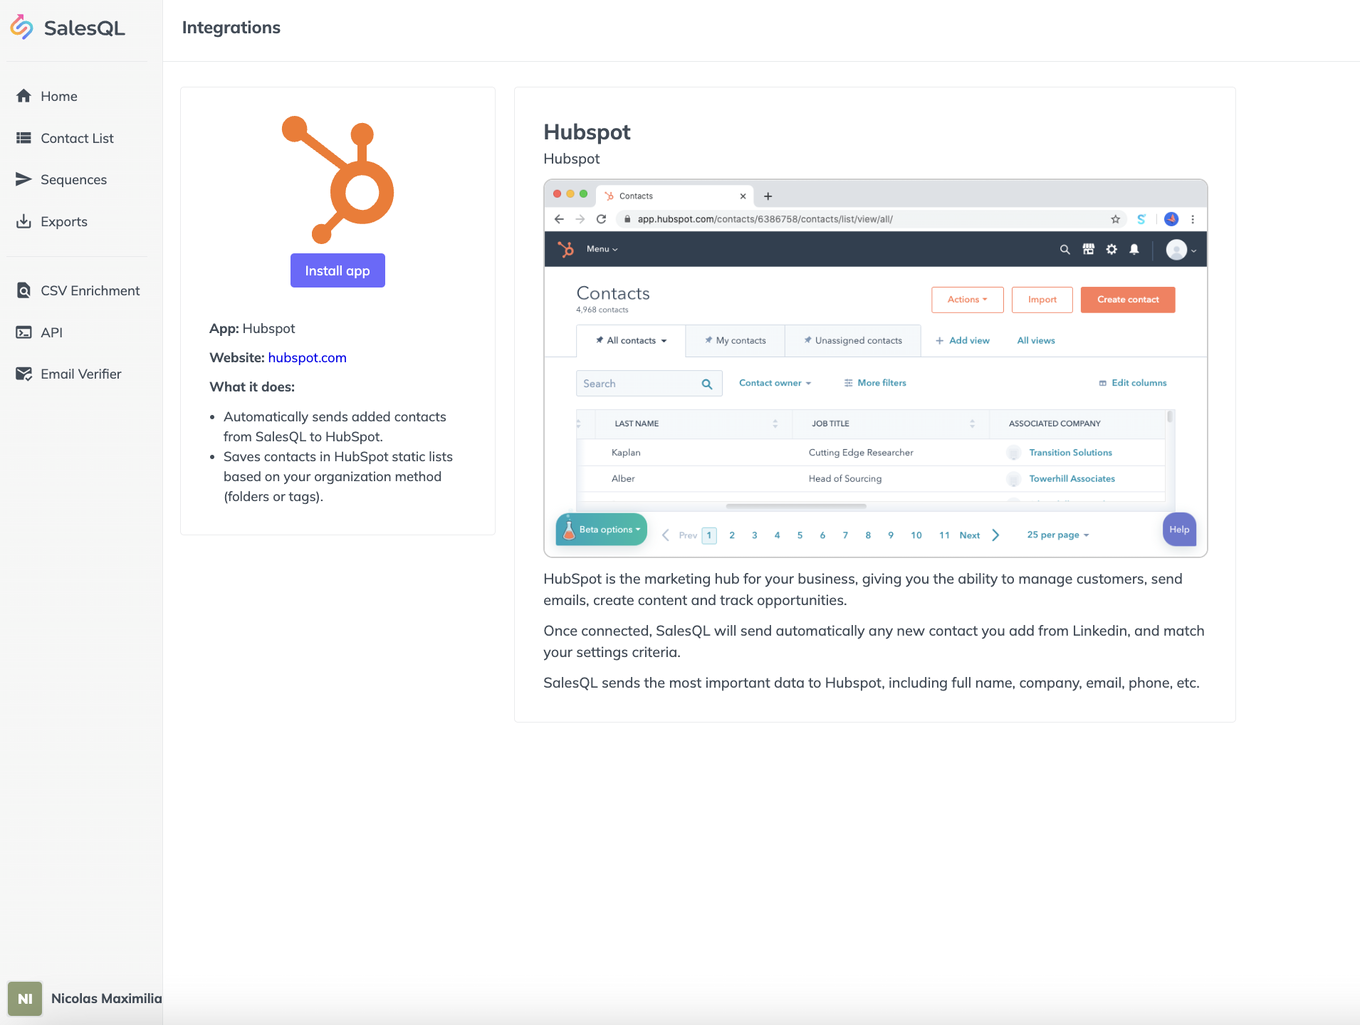
  1. Install the app.

    HubSpot app page in SalesQL Integrations with the HubSpot logo and the "Install app" button
  2. Select the projects you want to export, and click the ‘Enable’ button. This will take you to HubSpot.
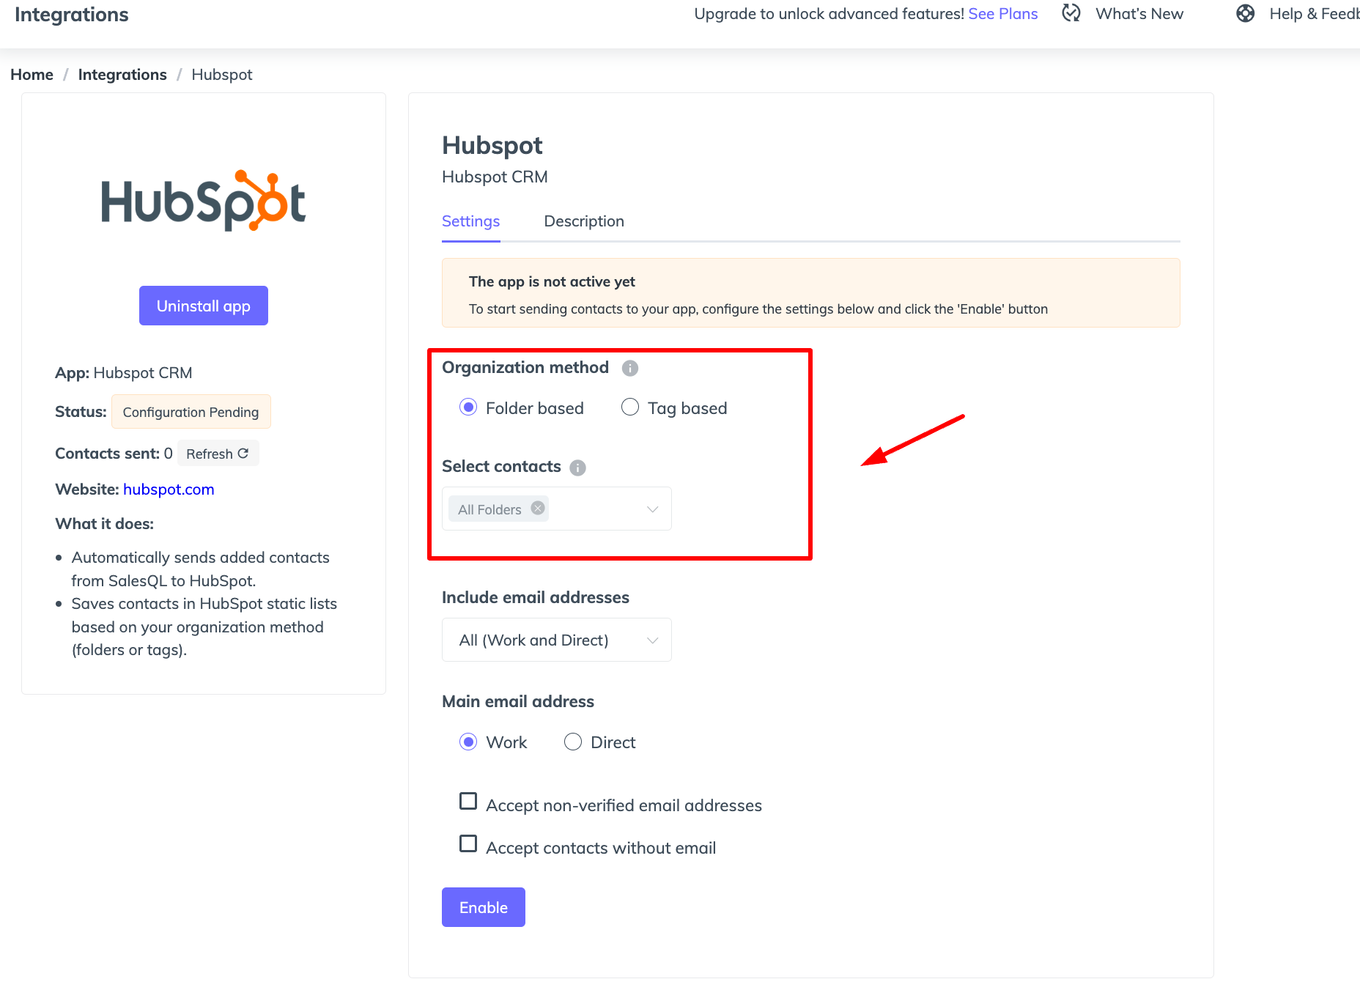
    HubSpot integration settings in SalesQL with "Organization method" and "Select contacts" highlighted
  3. If you already have a HubSpot account, log in, if you don't, you'll have to create one.
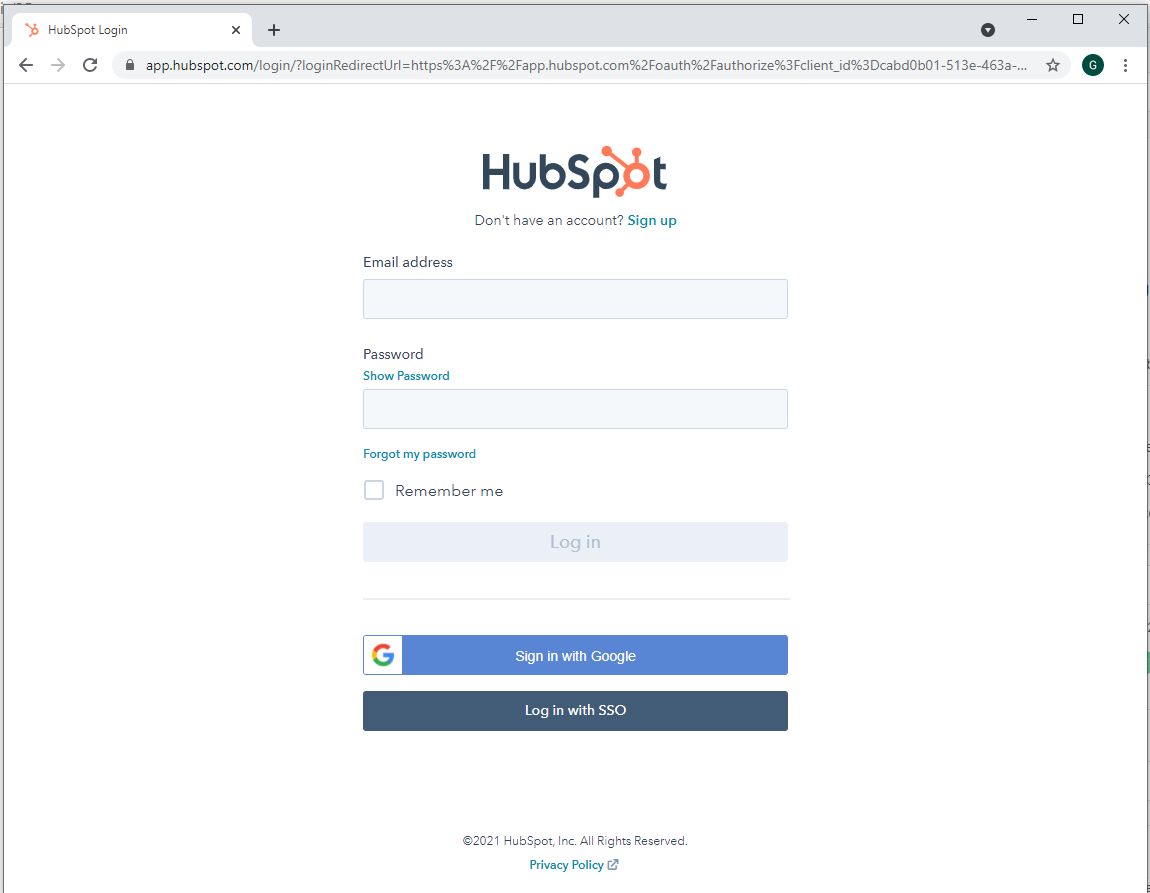
    HubSpot login page with email and password fields and the "Sign in with Google" and SSO options
  4. After logging in, the next step is to synchronize your HubSpot account with your SalesQL account. If you have multiple SalesQL accounts, such as a Business and Personal account, you can choose which one to sync with HubSpot.
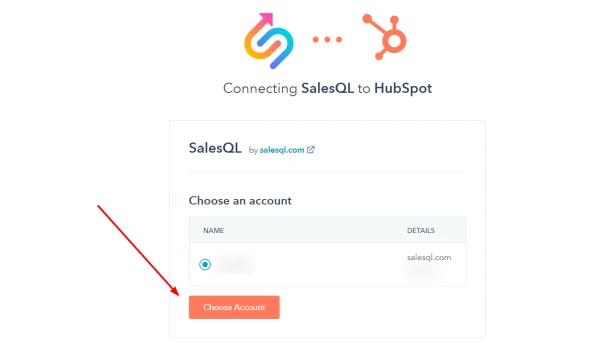
    "Connecting SalesQL to HubSpot" screen to choose the HubSpot account, with the "Choose Account" button
  5. If you have performed the previous steps correctly, you'll be redirected to the SalesQL page, where you can see that the status is ‘Active’:
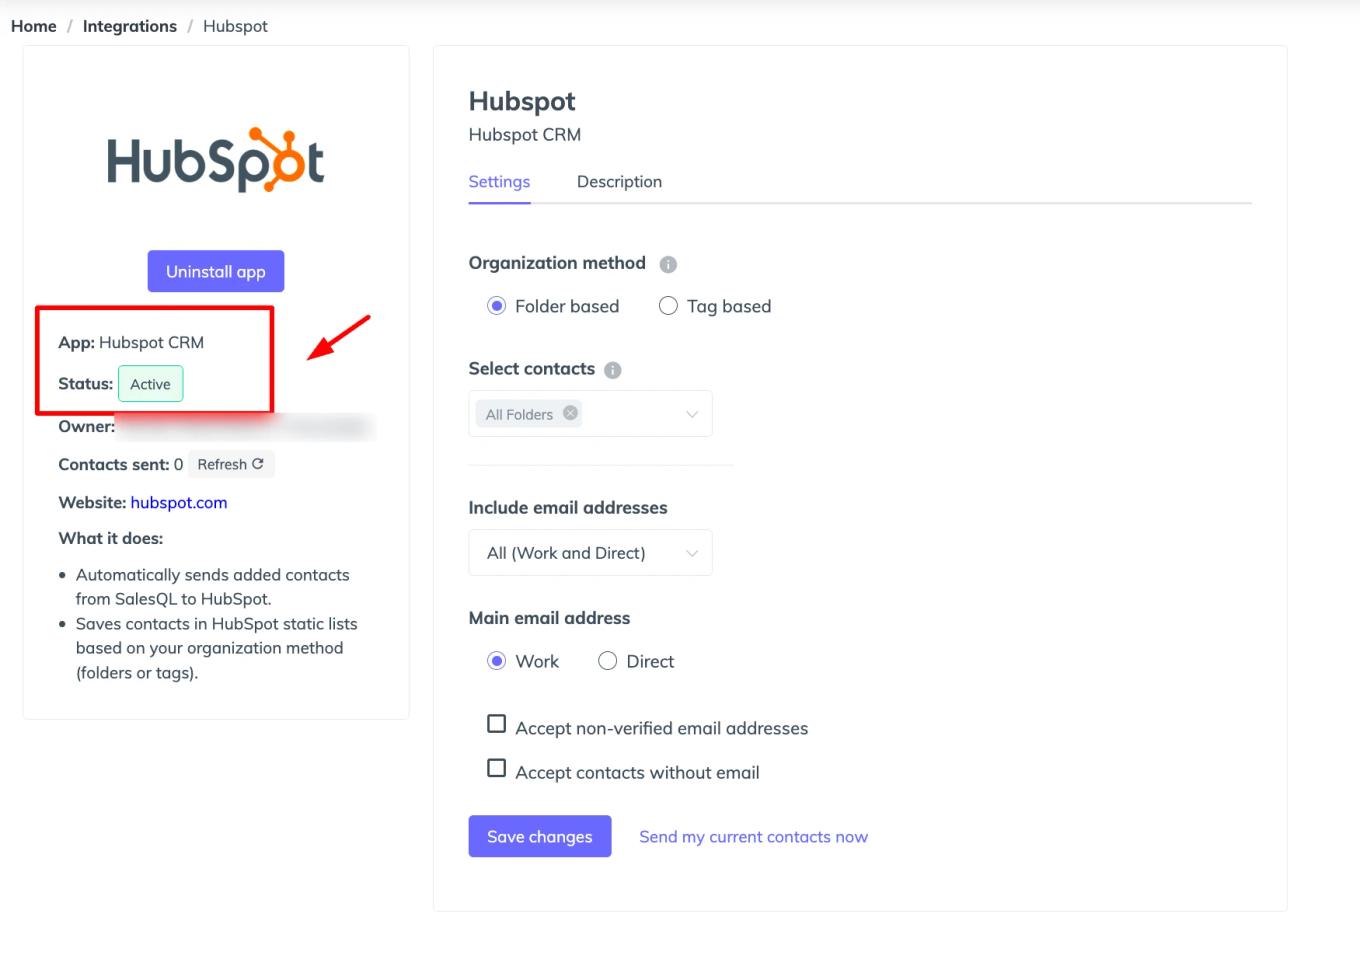
    HubSpot integration page in SalesQL with the "Active" status highlighted
  6. Then you can select the other filters and click on ‘Save changes’.
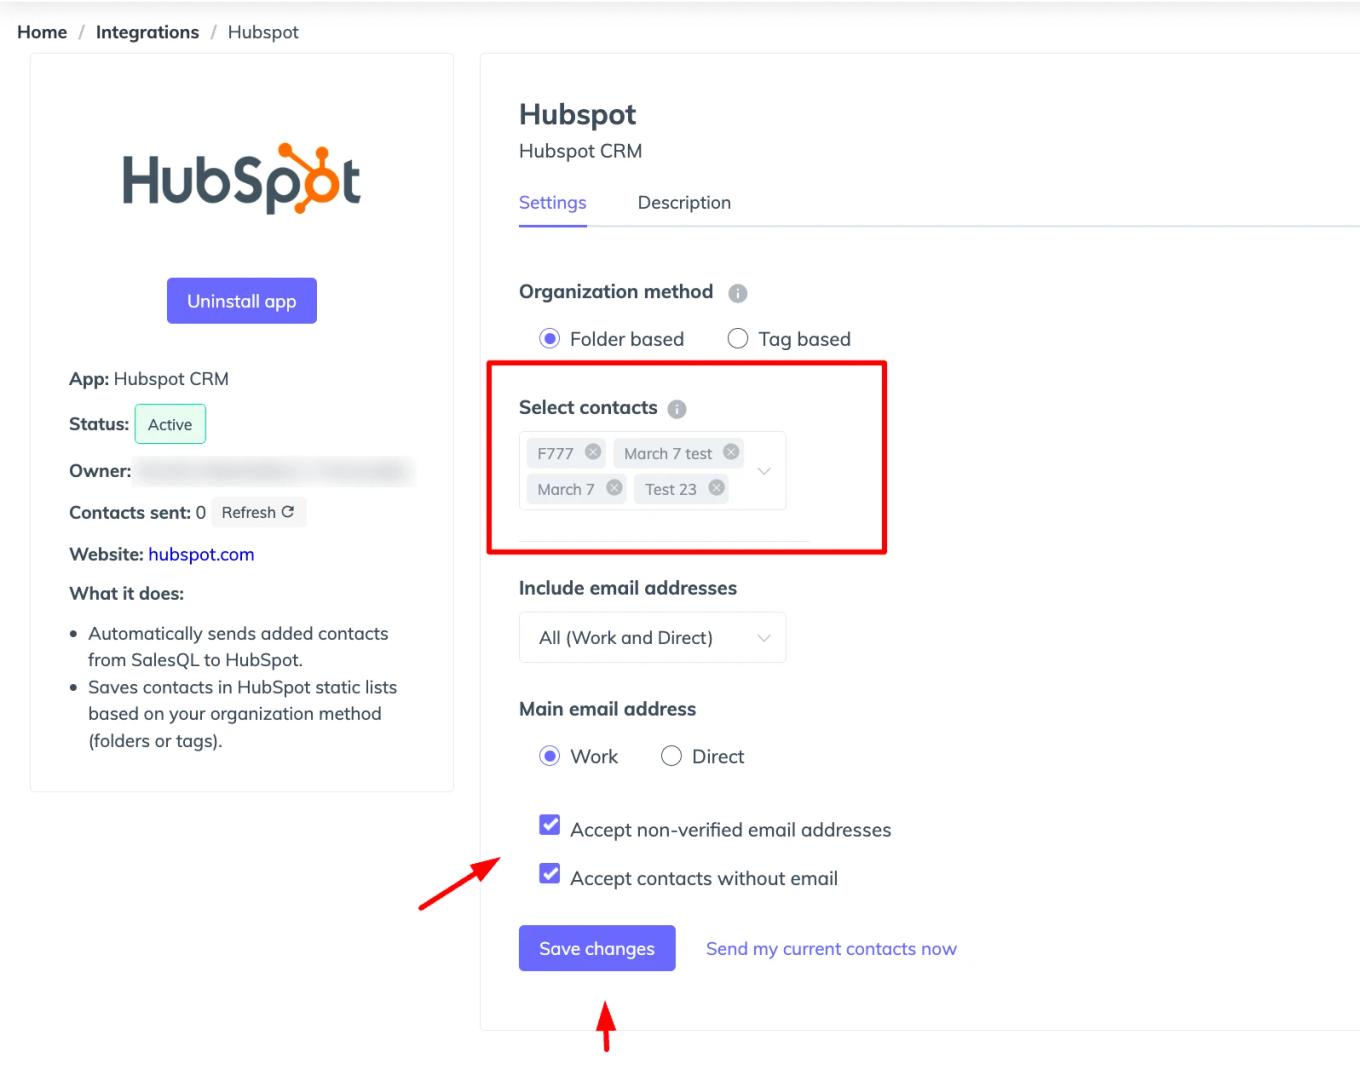
    HubSpot integration settings with folders selected, email options checked and the "Save changes" button
  7. Lastly, click on ‘Integrate my current contacts’, and all the contacts that comply with the filters chosen above, will be exported.
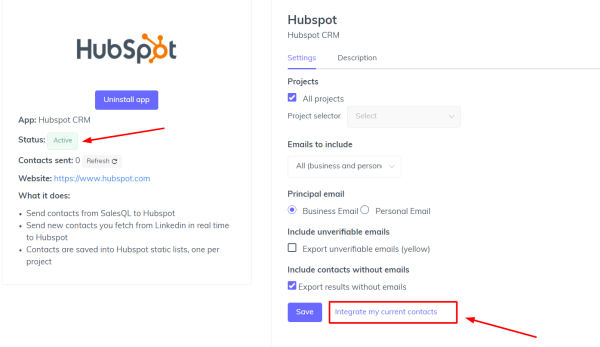
    7395df5d45c940f83fe99b49b5f1b7eb.png

How to filter projects in HubSpot

Just follow these simple steps.

Firstly, go to the main page in HubSpot, click on ‘Contacts’ and then on ‘Lists‘.

HubSpot home with the "Contacts" menu open and the "Lists" option pointed out

There you can see your projects created in SalesQL as lists in HubSpot.

HubSpot "Lists" page showing SalesQL projects as static contact lists

If you go into a project, you can see your contacts exported from SalesQL.

"Project 4" list in HubSpot with contacts exported from SalesQL, emails and phone numbers pixelated

How to see more information in HubSpot

At present, we are sending a considerable amount of information to HubSpot, which includes the person's name, company, location, email address, phone number, and company URL. However, certain fields are not supported by HubSpot, such as people's pictures or information regarding their education.

If you require access to additional information beyond the fields currently supported by HubSpot, you will need to take the following steps:

  1. First download the contacts you want to see in HubSpot from SalesQL.
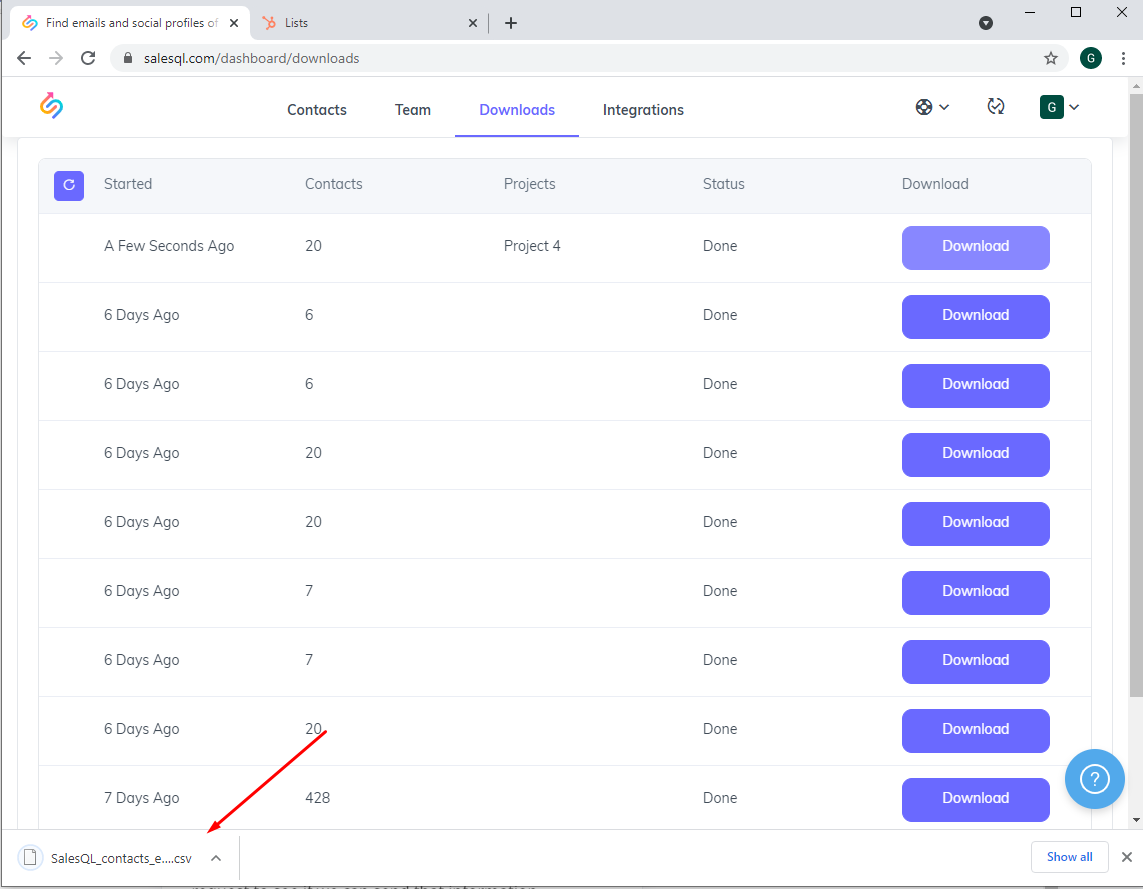
    SalesQL "Downloads" page with a finished "Project 4" export and the CSV file in the browser downloads bar
  2. Then go to the main page in HubSpot, click on ‘Contacts’ and then on ‘Lists’.
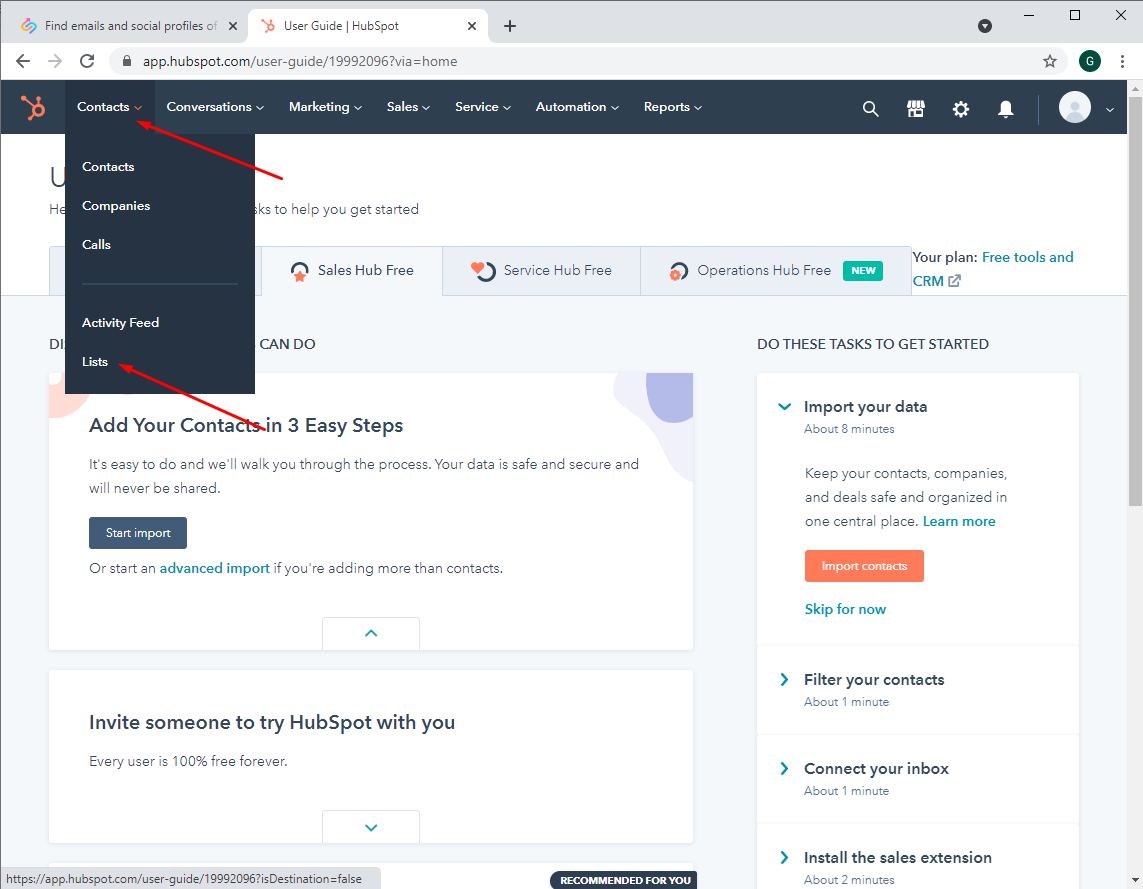
    HubSpot home with the "Contacts" menu open and the "Lists" option pointed out
  3. Once you see all the lists, click the ‘Import’ button.
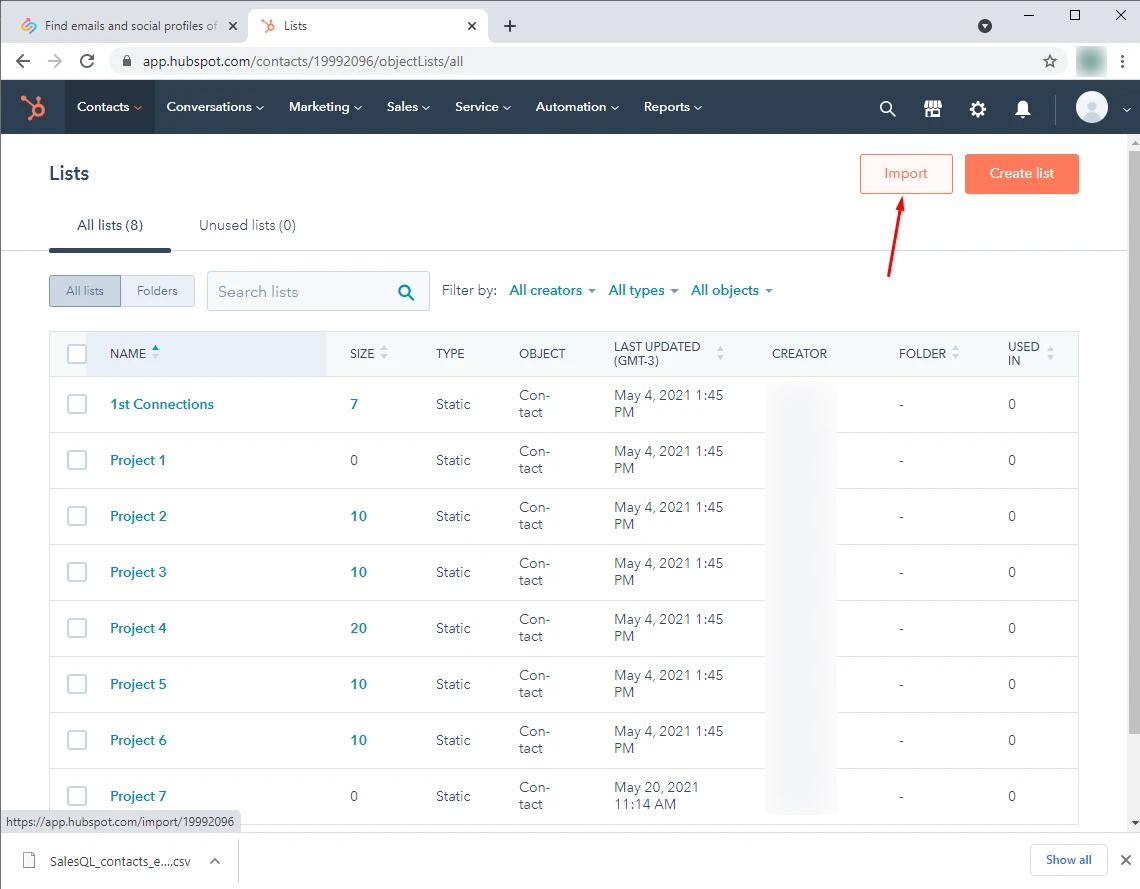
    HubSpot "Lists" page with the "Import" button pointed out
  4. Choose the ‘Start an Import’ option.
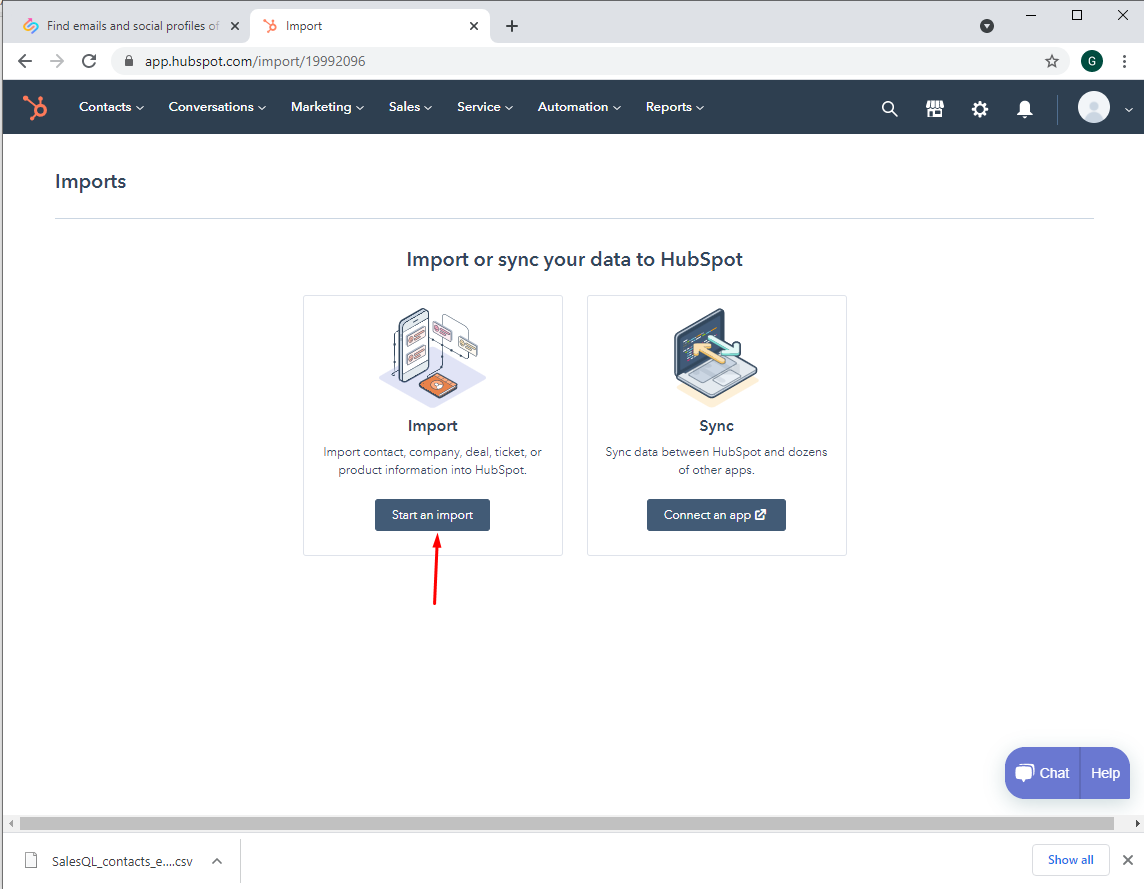
    HubSpot "Imports" page with the "Start an import" button pointed out
  5. Choose the ‘File from Computer’ option and then click ‘Next’.
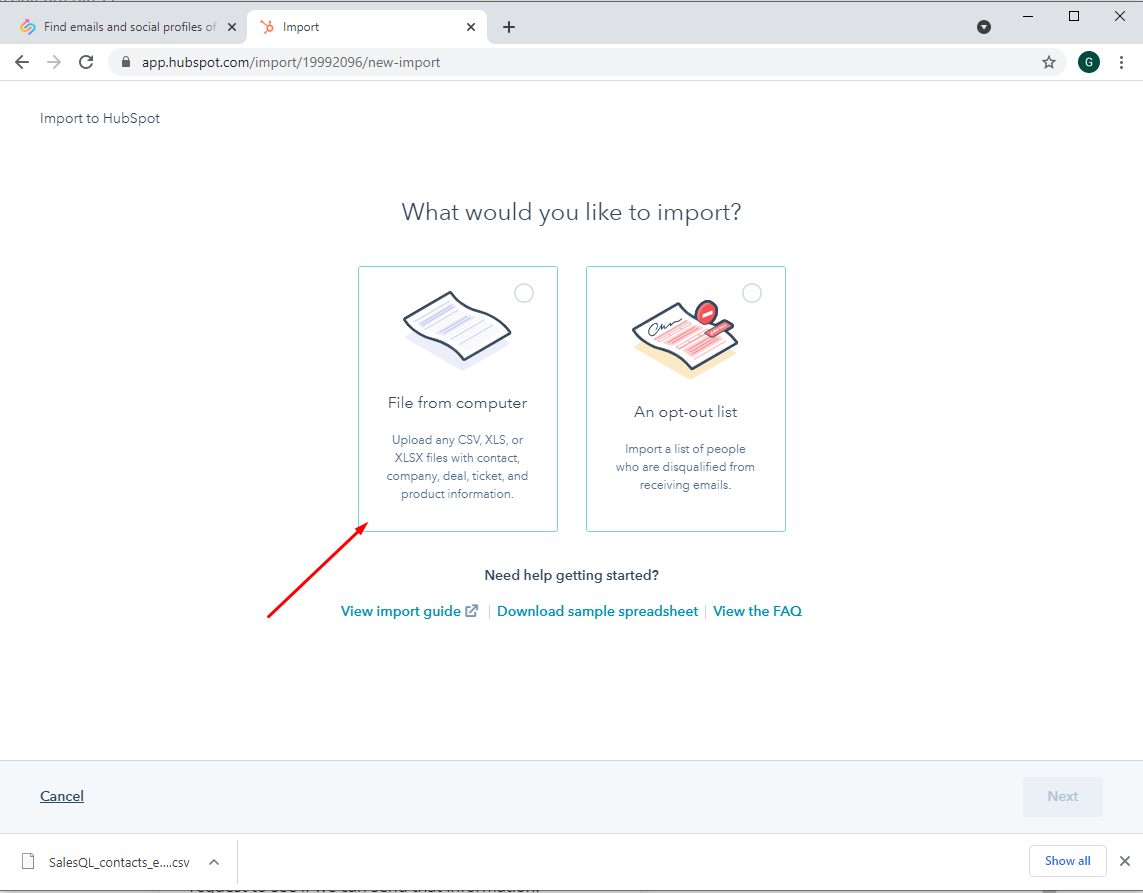
    HubSpot "What would you like to import?" screen with the "File from computer" option pointed out
  6. Here you can choose whether you want to import just one file or multiple files. We'll choose one file for this demo.
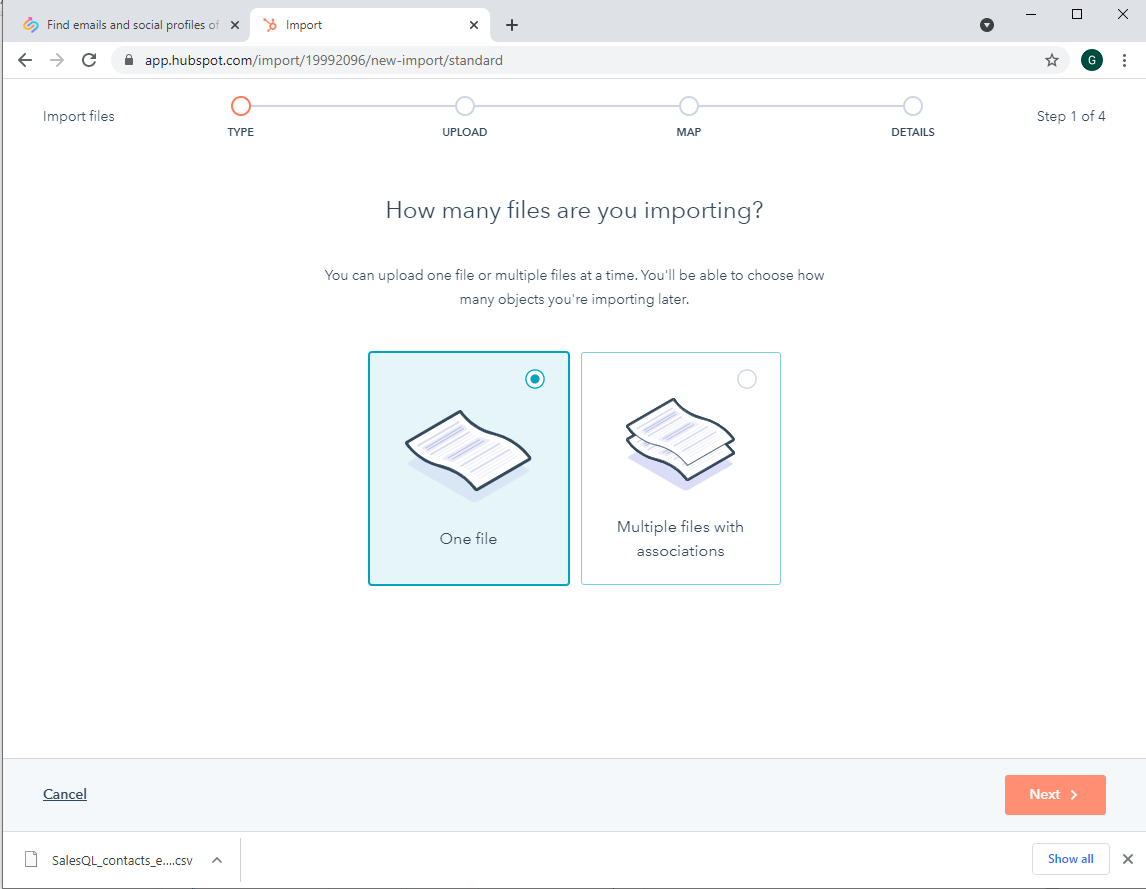
    HubSpot import step "How many files are you importing?" with "One file" selected
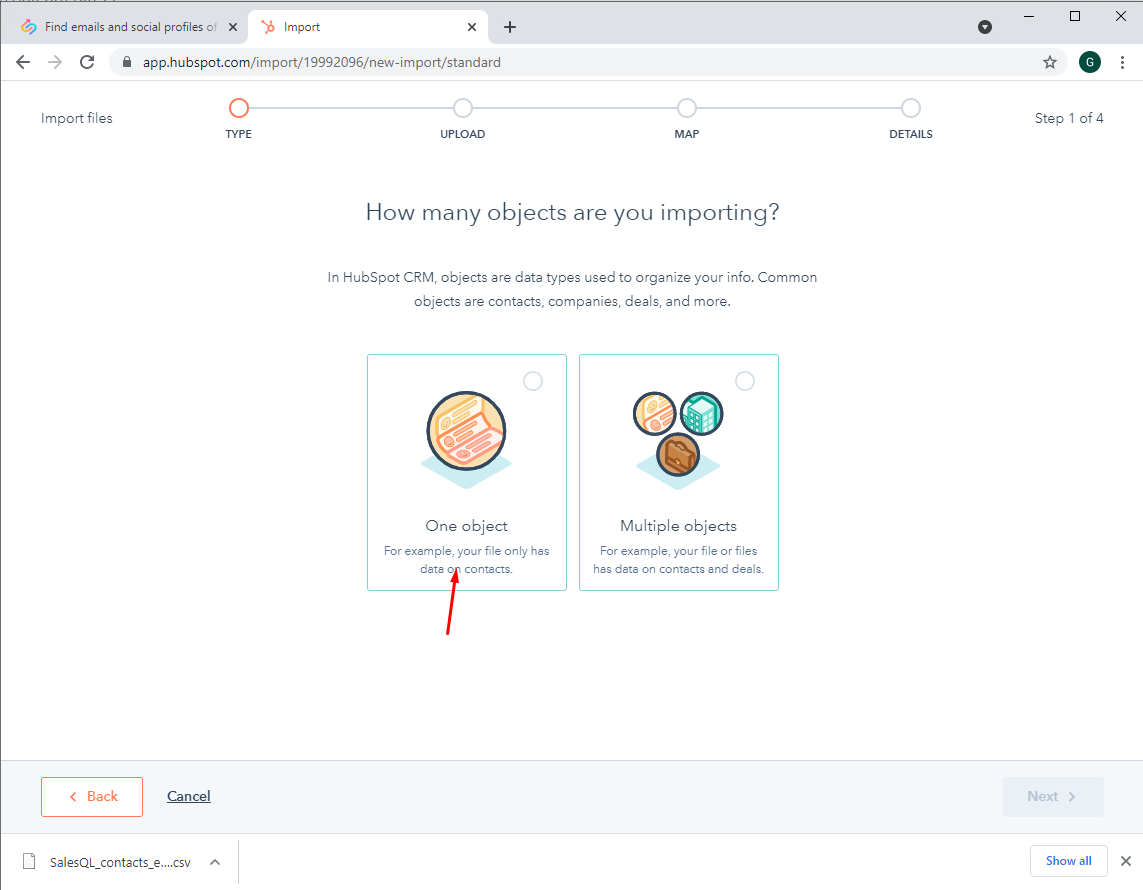
  7. Now select the ‘One Object’ option.

    HubSpot import step "How many objects are you importing?" with the "One object" option pointed out
  8. Lastly, you can choose the option you want. We'll choose the ‘Contacts’ option.
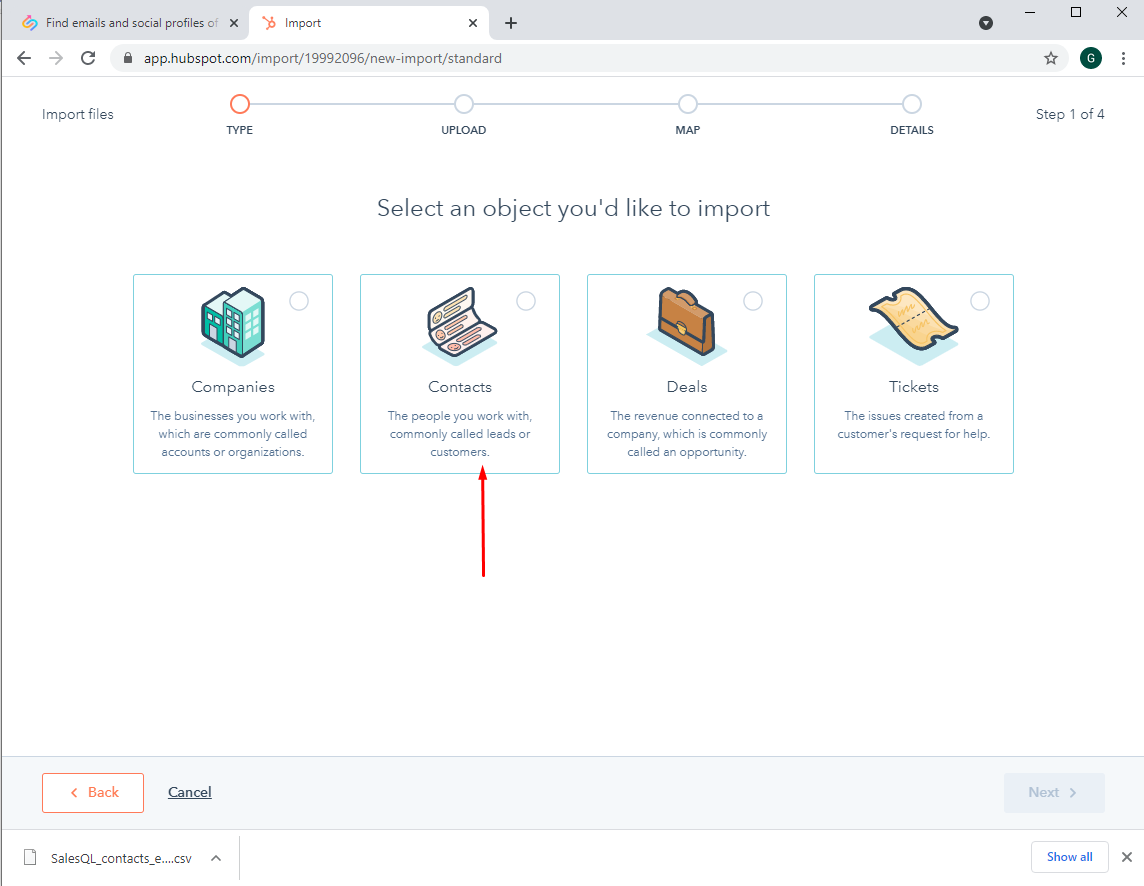
    HubSpot "Select an object you'd like to import" screen with the "Contacts" option pointed out
  9. Now you have to drag and drop the file (or files) or choose the ones you want to import.
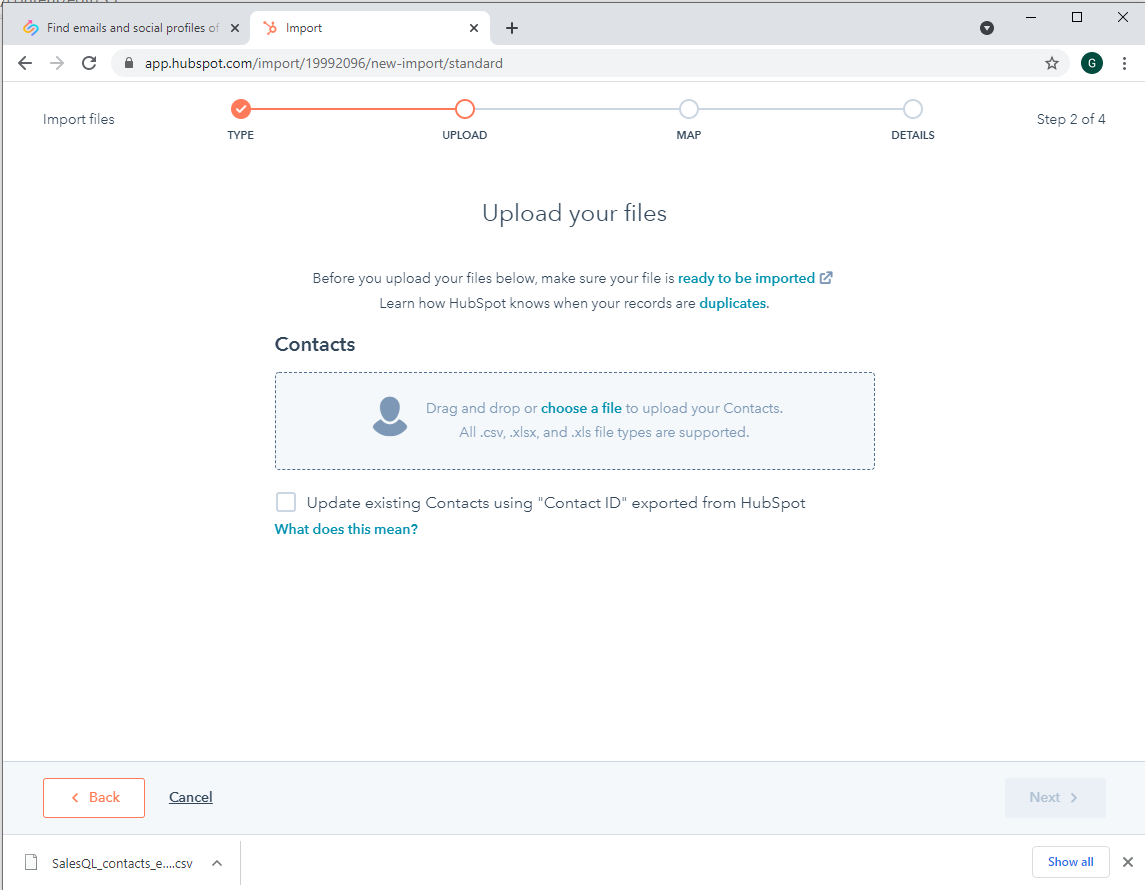
    HubSpot "Upload your files" step with the drag-and-drop area for the Contacts file
  10. Now, as you can see, some information has been imported automatically including the first and last name, but you can choose or create new properties for the information imported from SalesQL. For this demo, let’s choose the property ‘Job Function’.
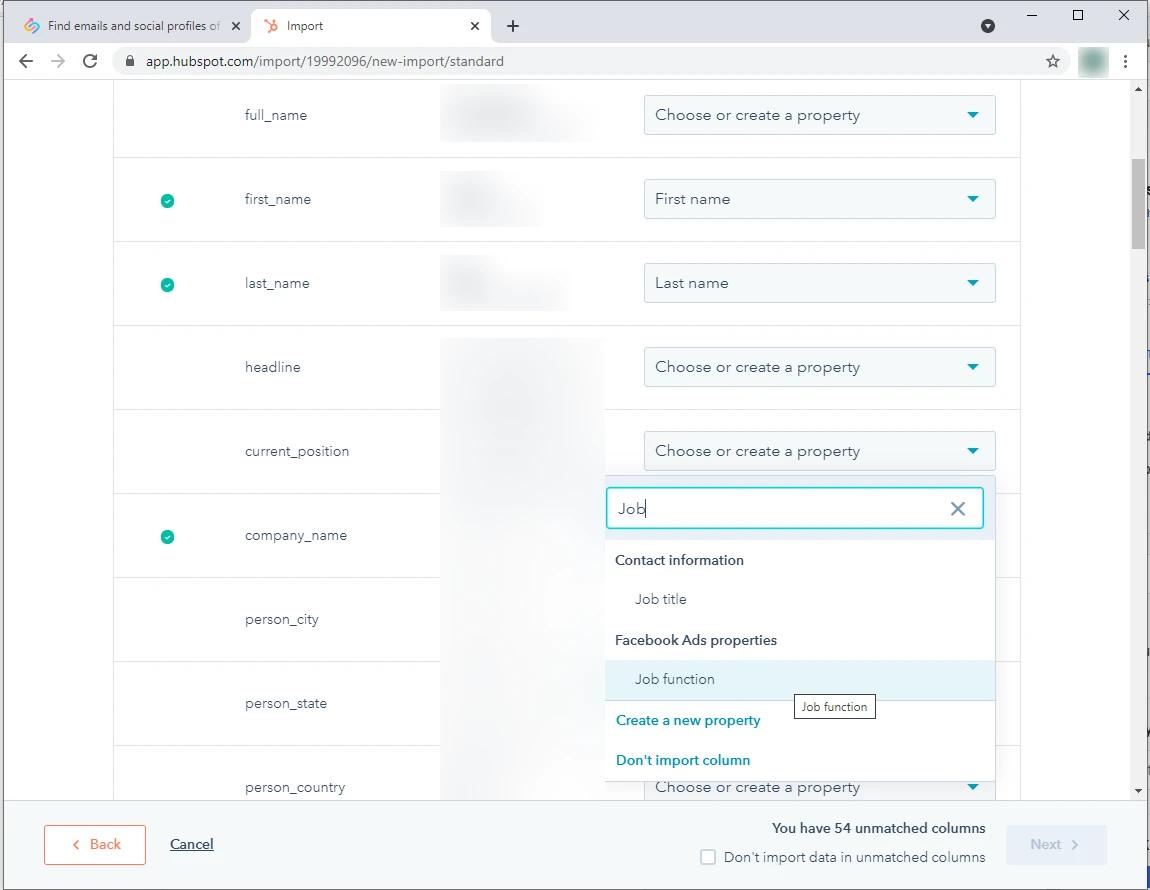
    HubSpot column mapping with the property search open and "Job function" highlighted
  11. If you’ve finished selecting the properties you want to import but didn’t select all of them, you'll have to check this option, so the remaining information will not be imported in HubSpot.
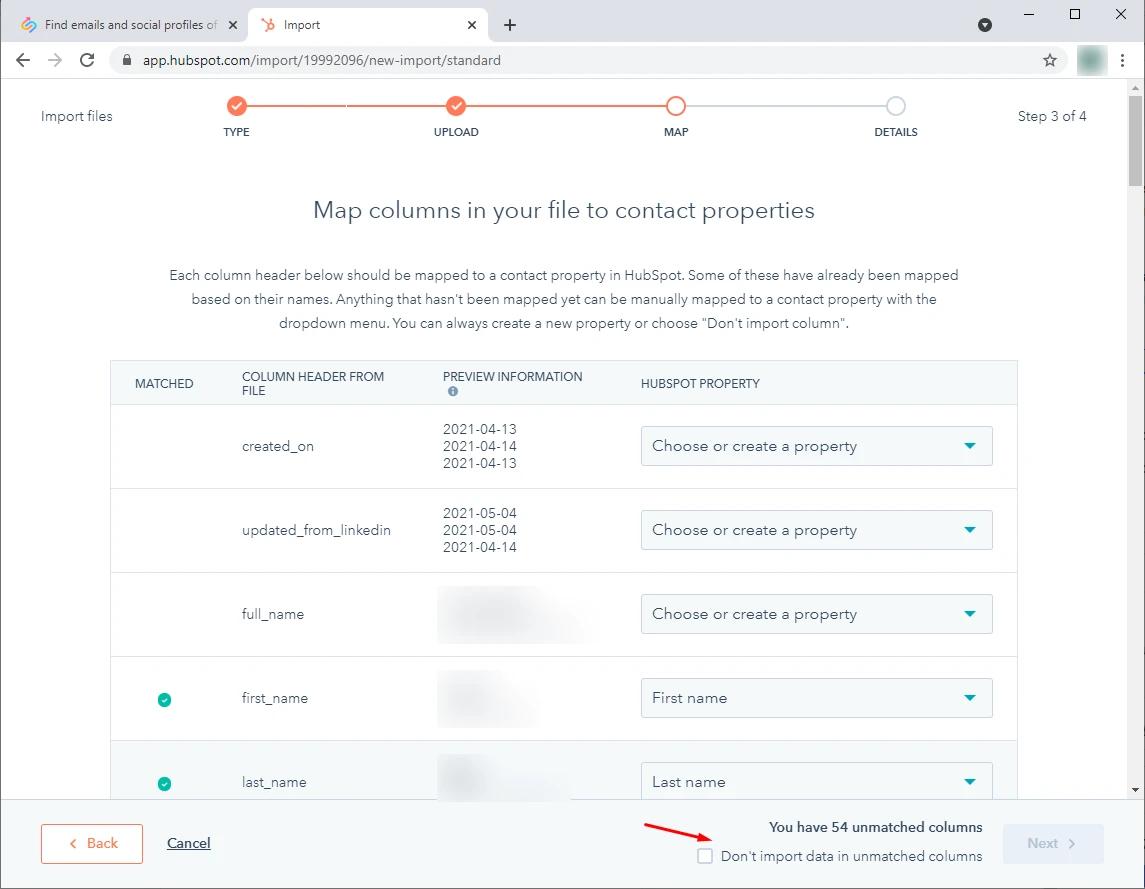
    HubSpot "Map columns" step with the "Don't import data in unmatched columns" checkbox pointed out
  12. Lastly, you have to create a name for your import and choose whether you want to give it a new list or not.
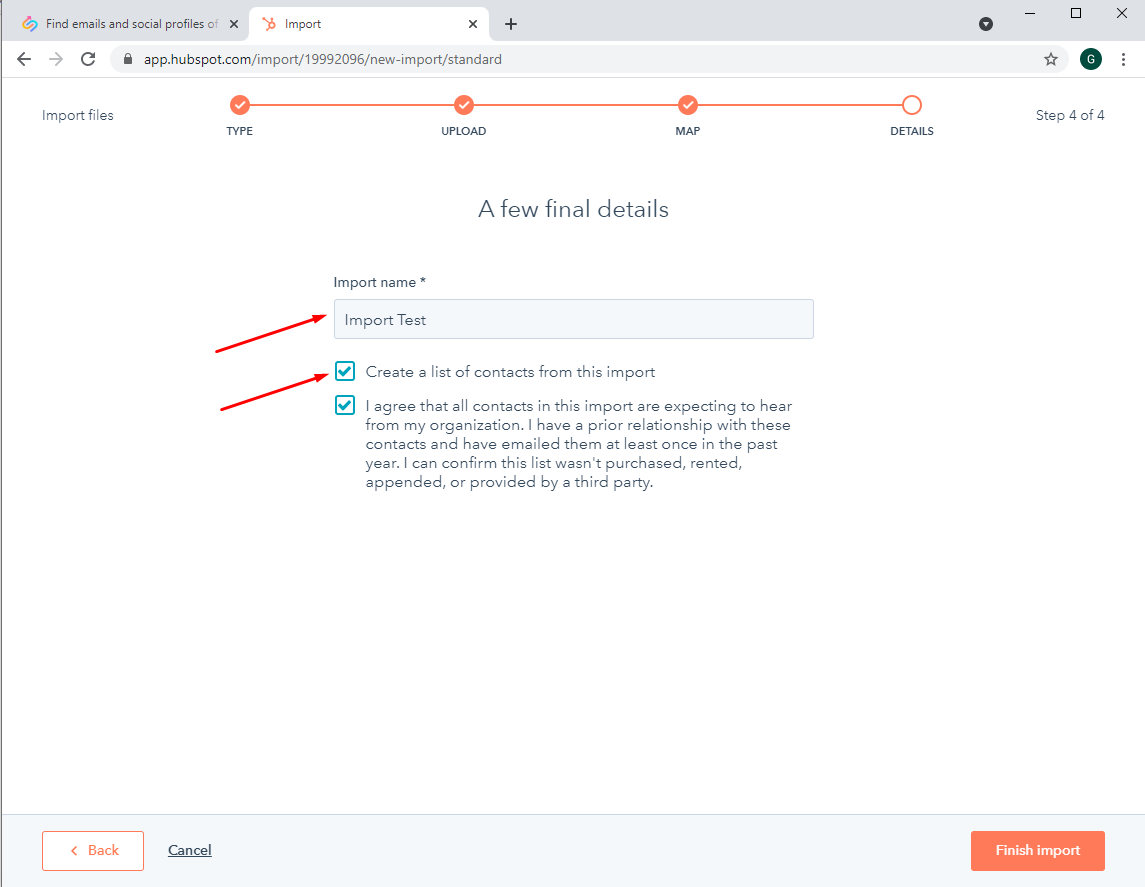
    HubSpot final import step with the "Import name" field and "Create a list of contacts from this import" checked

More in Integrations

  • Mailchimp Integration

    Connect SalesQL to Mailchimp, send your existing contacts to an audience, and filter them in Mailchimp by the tags created from your SalesQL folders.

  • Zoho CRM Integration

    Sync SalesQL with Zoho CRM to export your folders' contacts as Leads, and fix the sync error by creating a Zoho CRM account first.

  • Zapier Integration

    Connect your SalesQL account to Zapier from the Integrations page of your dashboard, then build Zaps that connect SalesQL with other apps, such as Gmail.

  • SalesQL with Google Sheets

    Send new SalesQL contacts to a Google Sheet automatically with a Zapier Zap, from setting up the trigger to mapping columns and publishing it.

See all 5 articles in Integrations