Integrations

Mailchimp Integration

Connect SalesQL to Mailchimp, send your existing contacts to an audience, and filter them in Mailchimp by the tags created from your SalesQL folders.

How to sync SalesQL with Mailchimp

Follow these simple steps to sync your SalesQL account with Mailchimp.

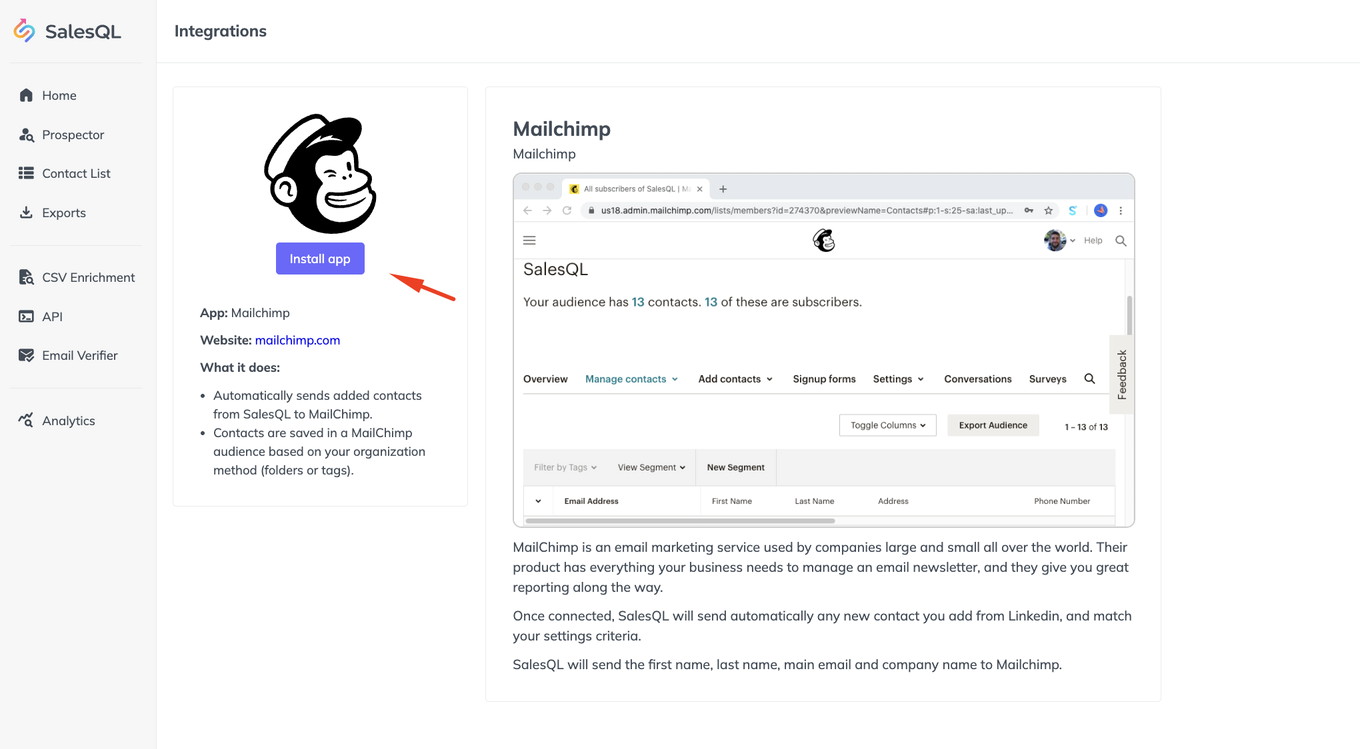
  1. Install the app

    Mailchimp app page in SalesQL Integrations with the Mailchimp logo and the "Install app" button
  2. Select 'All Folders'* and then filter the information you want to transfer to Mailchimp. You must have created at least a couple of folders using the SalesQL dashboard before you can send all your contacts to Mailchimp.

    All folders” currently refers to all the projects shown on your dashboard.
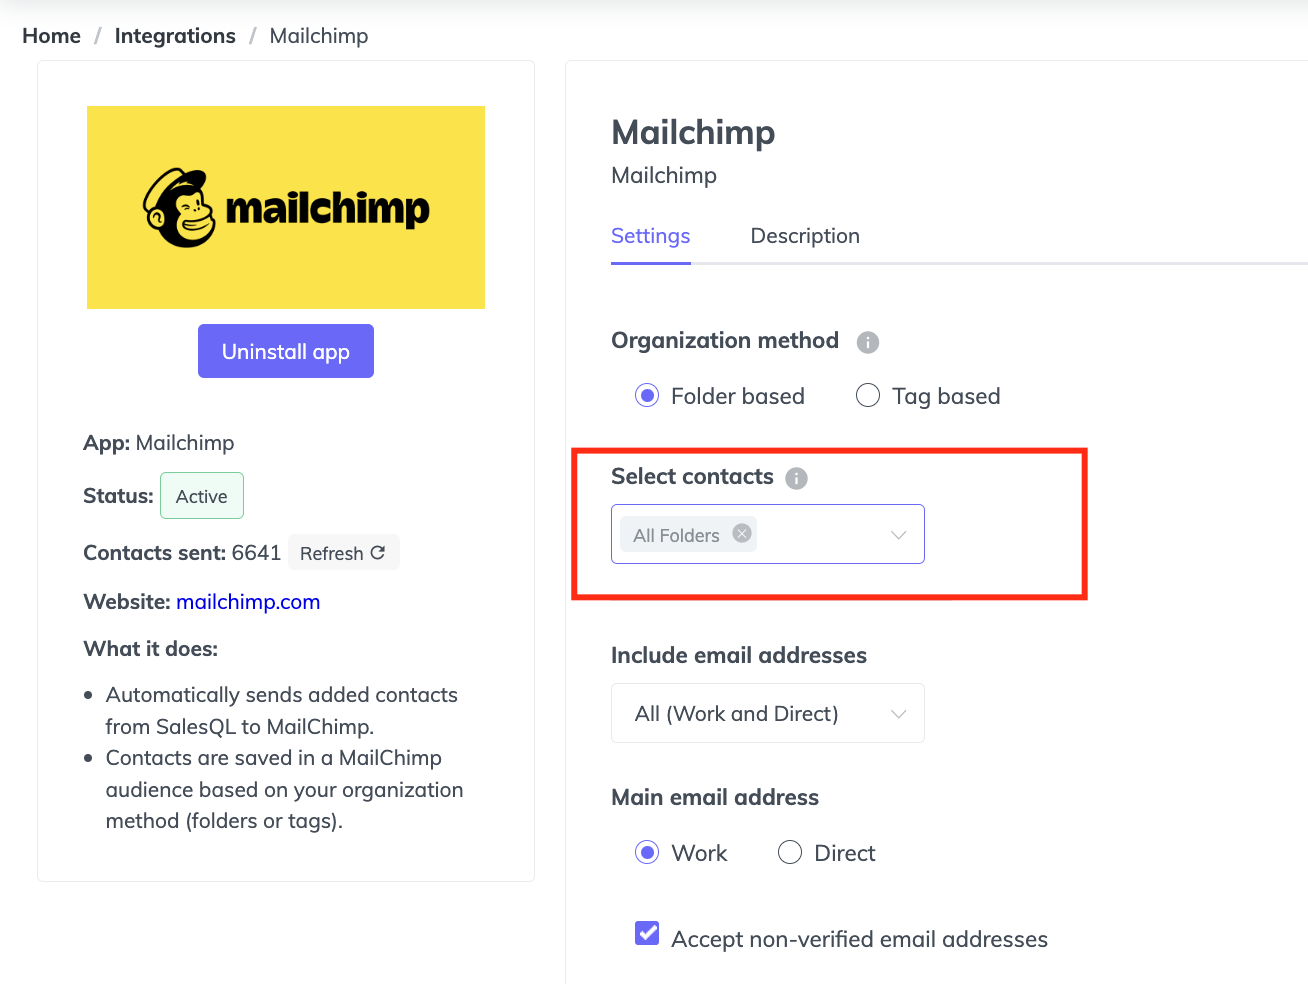
    Mailchimp integration settings in SalesQL with "All Folders" selected under "Select contacts"
  3. Click the ‘Activate’ button and you will be redirected to the Mailchimp website. If you already have an account, you’ll have to log in. If you don't, you’ll have to create a new account.
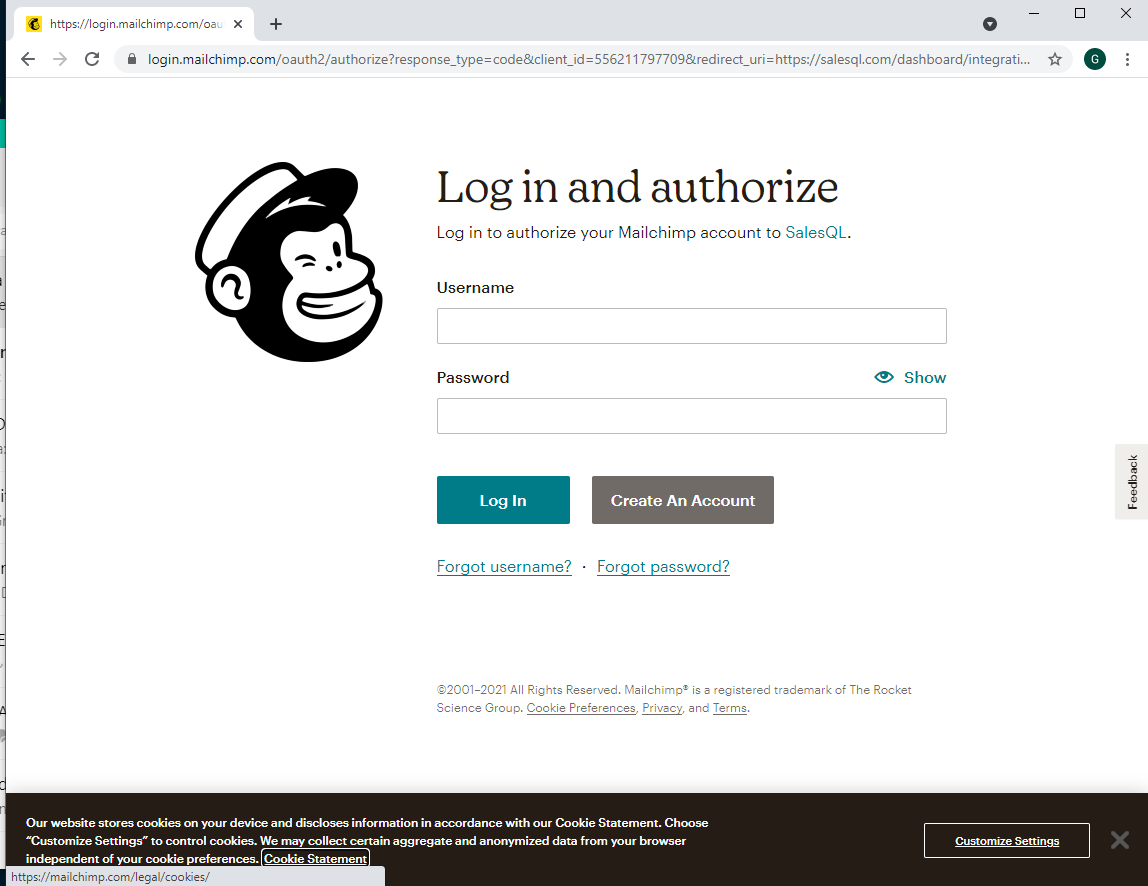
    Mailchimp "Log in and authorize" page with username and password fields
  4. Then you have to authorize SalesQL by pressing the 'Allow' button.
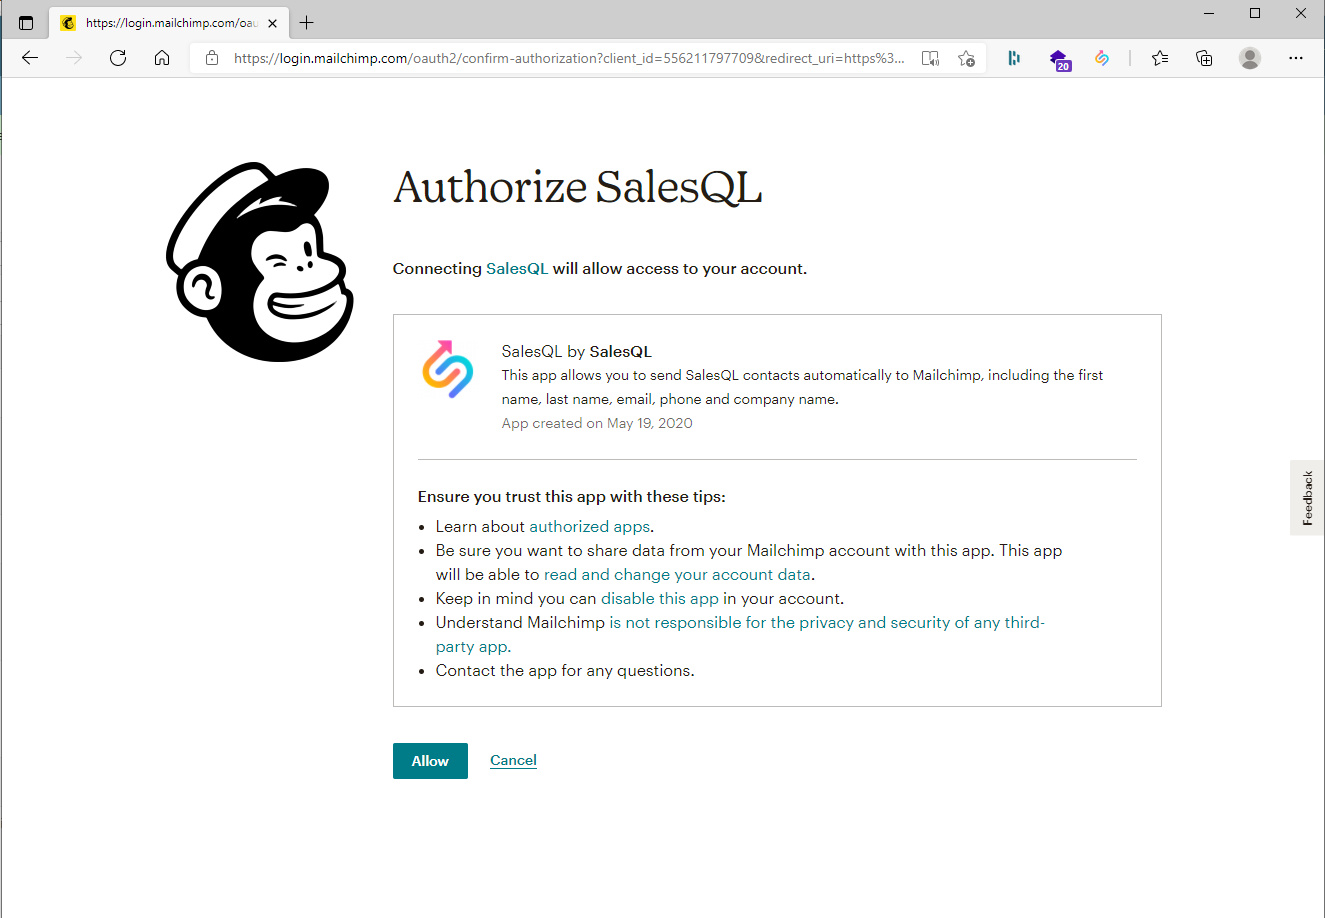
    Mailchimp "Authorize SalesQL" screen with the "Allow" button
  5. If all goes well, you will be redirected to the SalesQL Mailchimp integration settings. To enable the app, press the 'Save' button.

    That's all!👏 Your integration is up and running.
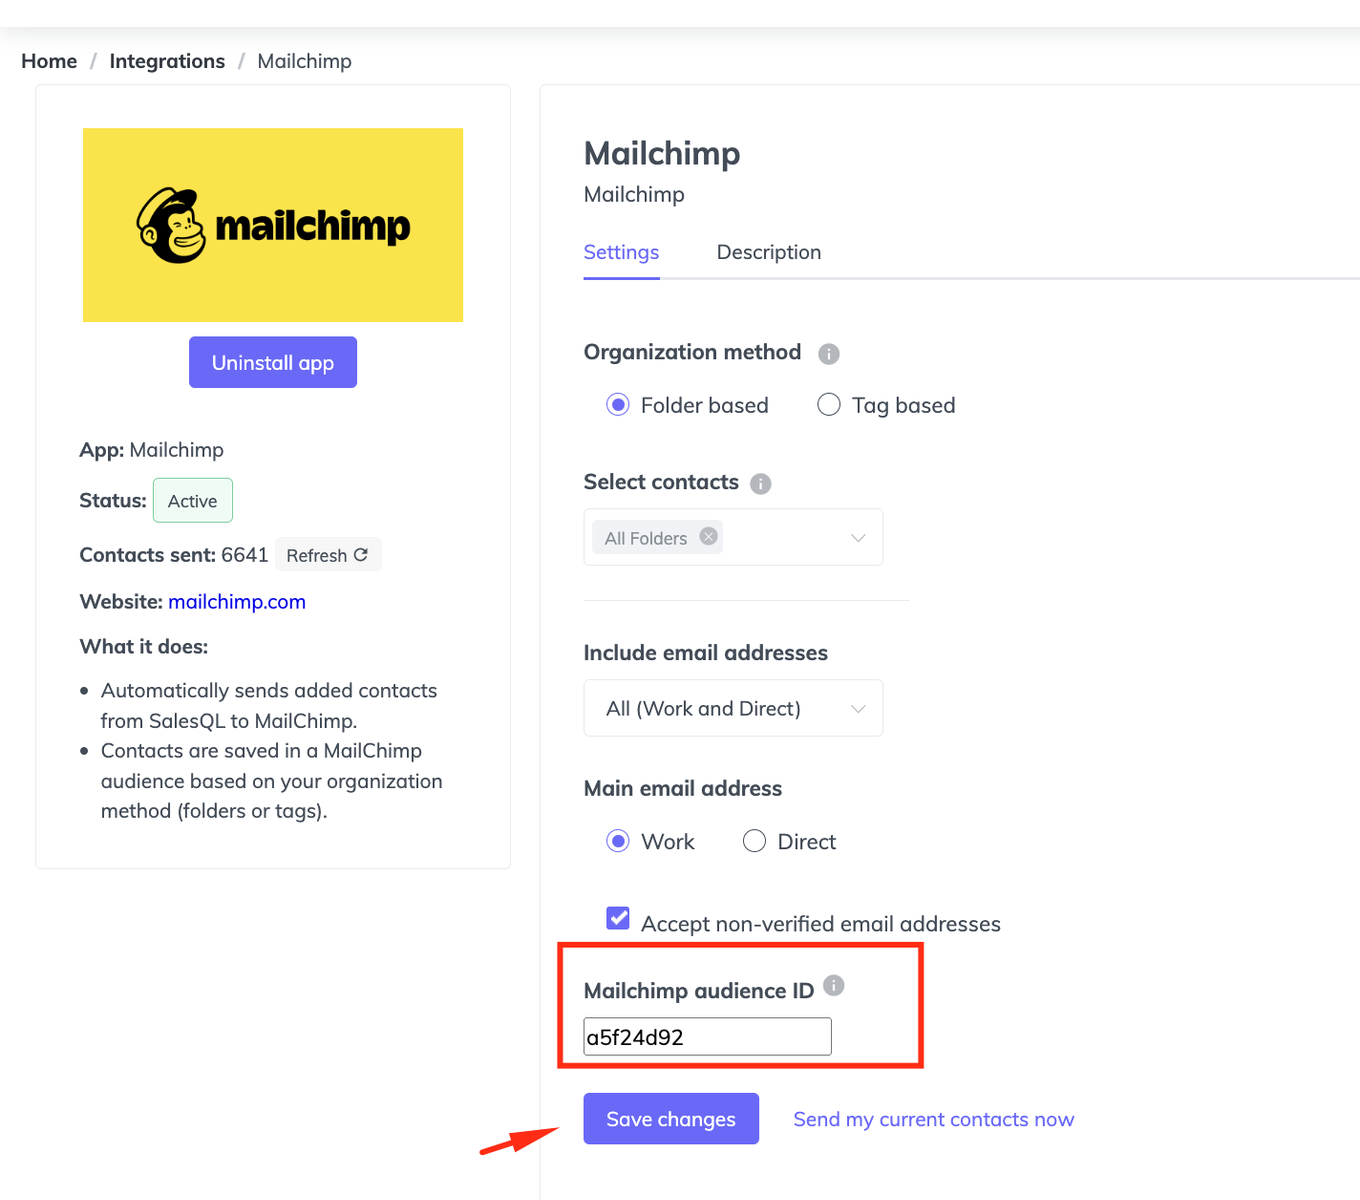
    Active Mailchimp integration in SalesQL with the "Mailchimp audience ID" field and the "Save changes" button

    The following steps are optional:

  6. If you want to send your existing SalesQL contacts to Mailchimp, select the ‘Integrate My Current Contacts’ option.
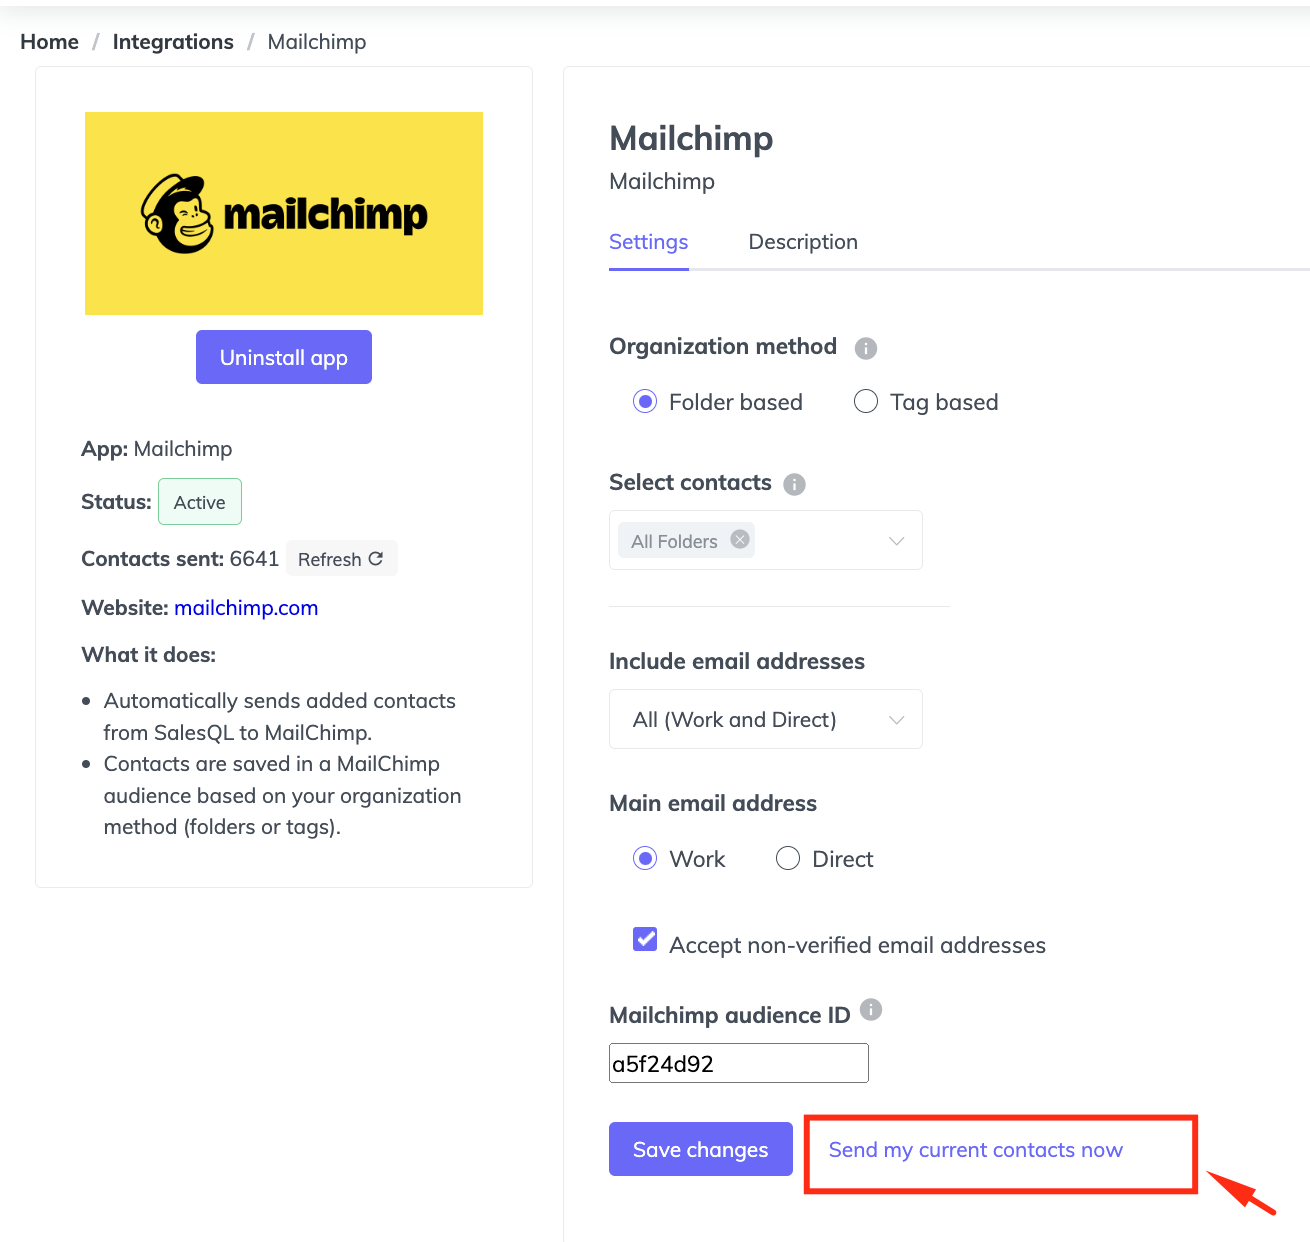
    Mailchimp integration settings in SalesQL with the "Send my current contacts now" link highlighted
  7. Change the 'Mailchimp audience id' field and press the 'Save' button in case you want to send your contacts to another Mailchimp audience.Check out Mailchimp's help center on how to find your audience id.

How to filter your contacts on Mailchimp by SalesQL tags

Just follow these simple steps.

  1. First, on Mailchimp and go to 'Audience'.
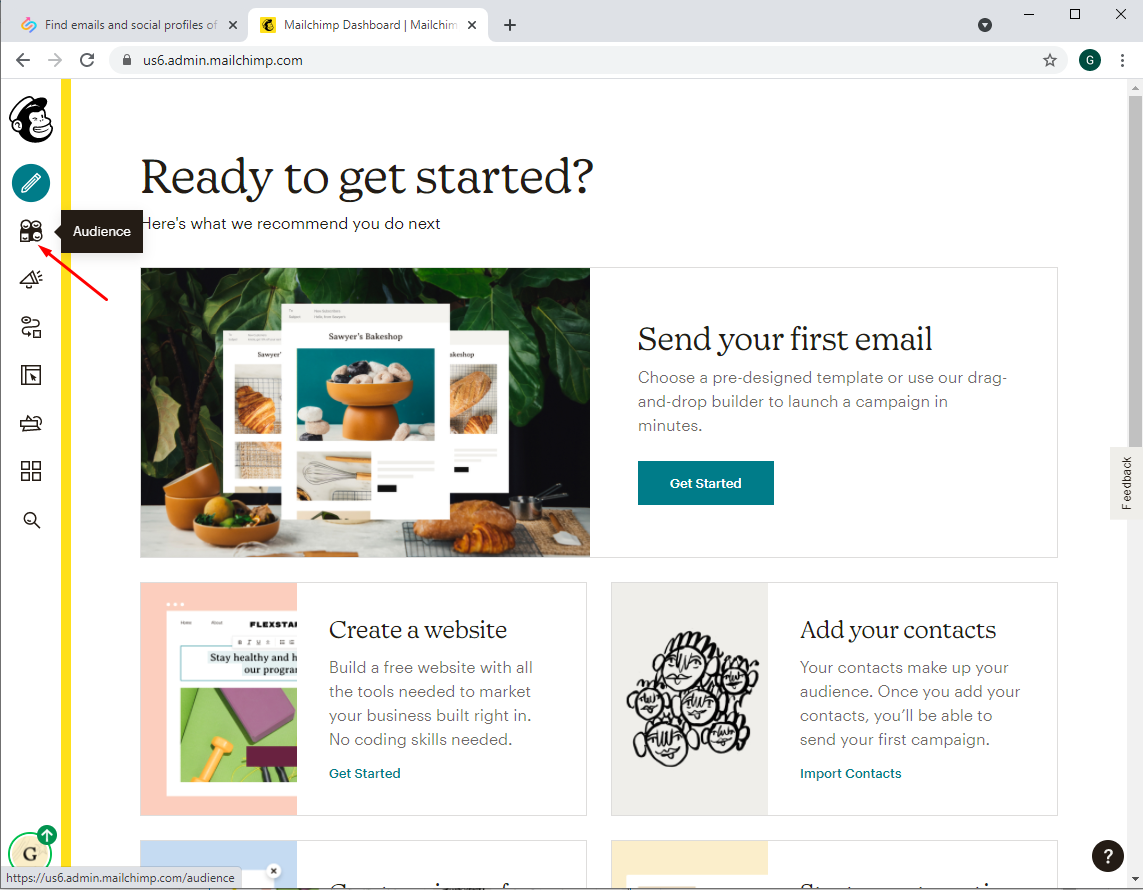
    Mailchimp dashboard with the "Audience" icon in the left sidebar pointed out
  2. Next, in the 'Audience' section, click 'All Contacts'.
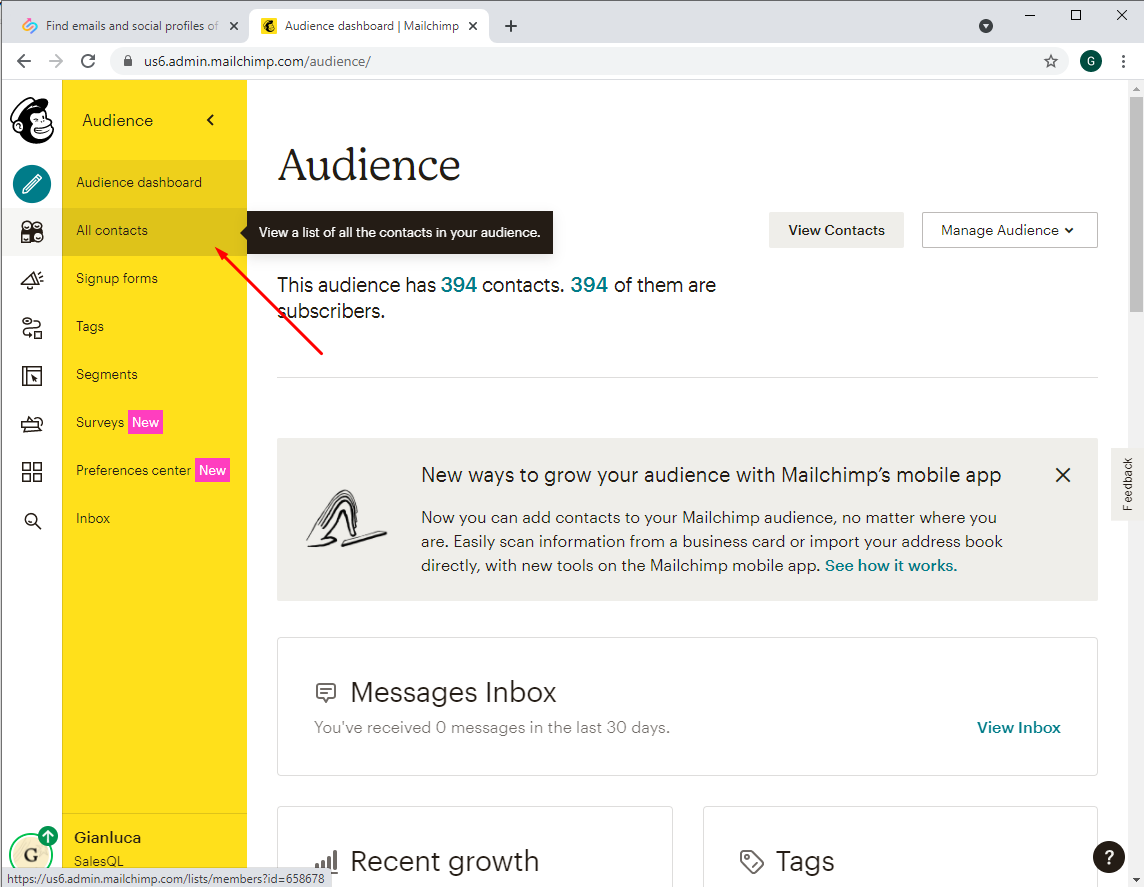
    Mailchimp "Audience" section with the "All contacts" menu option pointed out
  3. All contacts imported from SalesQL are listed here. Click on 'Tags' to filter your contacts by SalesQL tags (SalesQL folders are converted to tags in Mailchimp).
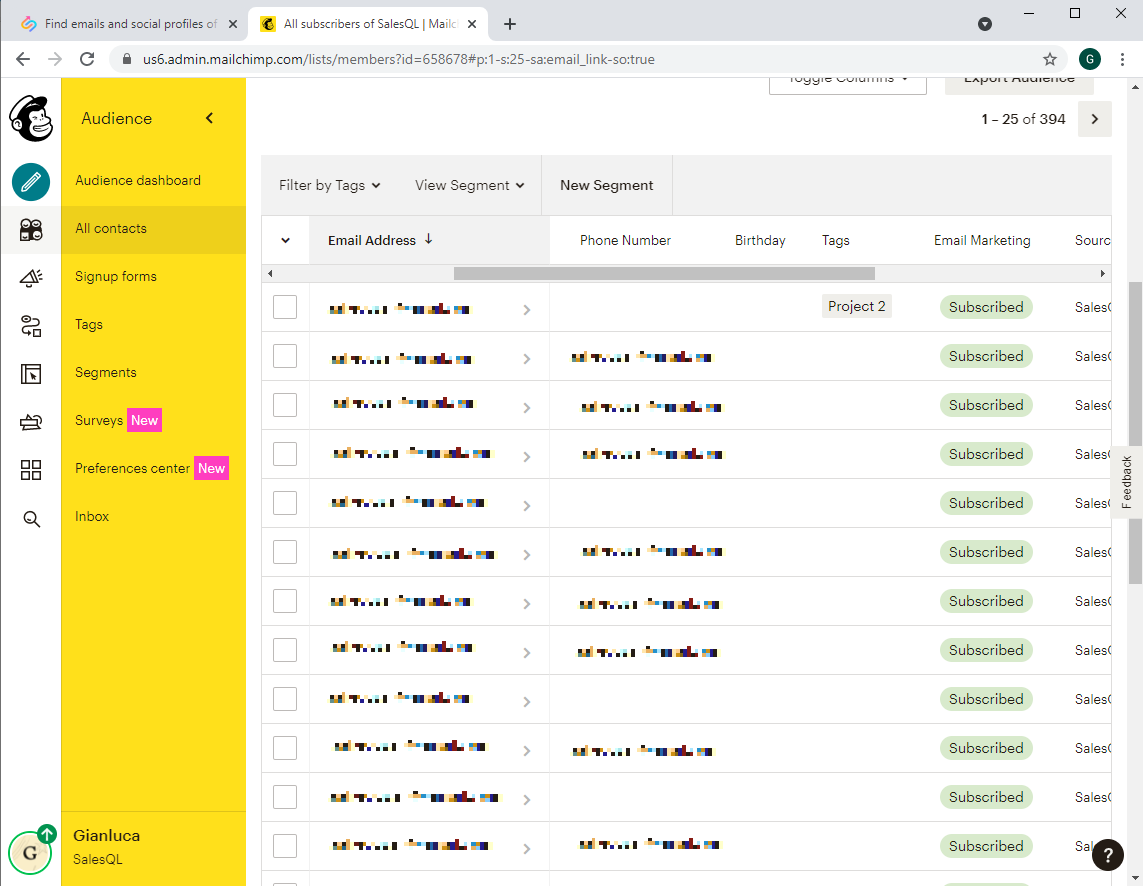
    Mailchimp "All contacts" audience list with imported SalesQL contacts marked "Subscribed" and the "Filter by Tags" menu

More in Integrations

  • HubSpot Integration

    Connect SalesQL to HubSpot, export your projects as HubSpot lists, and import extra contact fields from a SalesQL download with HubSpot's import tool.

  • Zoho CRM Integration

    Sync SalesQL with Zoho CRM to export your folders' contacts as Leads, and fix the sync error by creating a Zoho CRM account first.

  • Zapier Integration

    Connect your SalesQL account to Zapier from the Integrations page of your dashboard, then build Zaps that connect SalesQL with other apps, such as Gmail.

  • SalesQL with Google Sheets

    Send new SalesQL contacts to a Google Sheet automatically with a Zapier Zap, from setting up the trigger to mapping columns and publishing it.

See all 5 articles in Integrations