Getting started

Your first contact - SalesQL on Sales Navigator

Add a single Sales Navigator profile to a SalesQL folder from the extension, then open Current work folder to find the saved contact.

📋 In this guide, we will show you how to add individual contacts on Sales Navigator with SalesQL Lite. 📈👥🔍

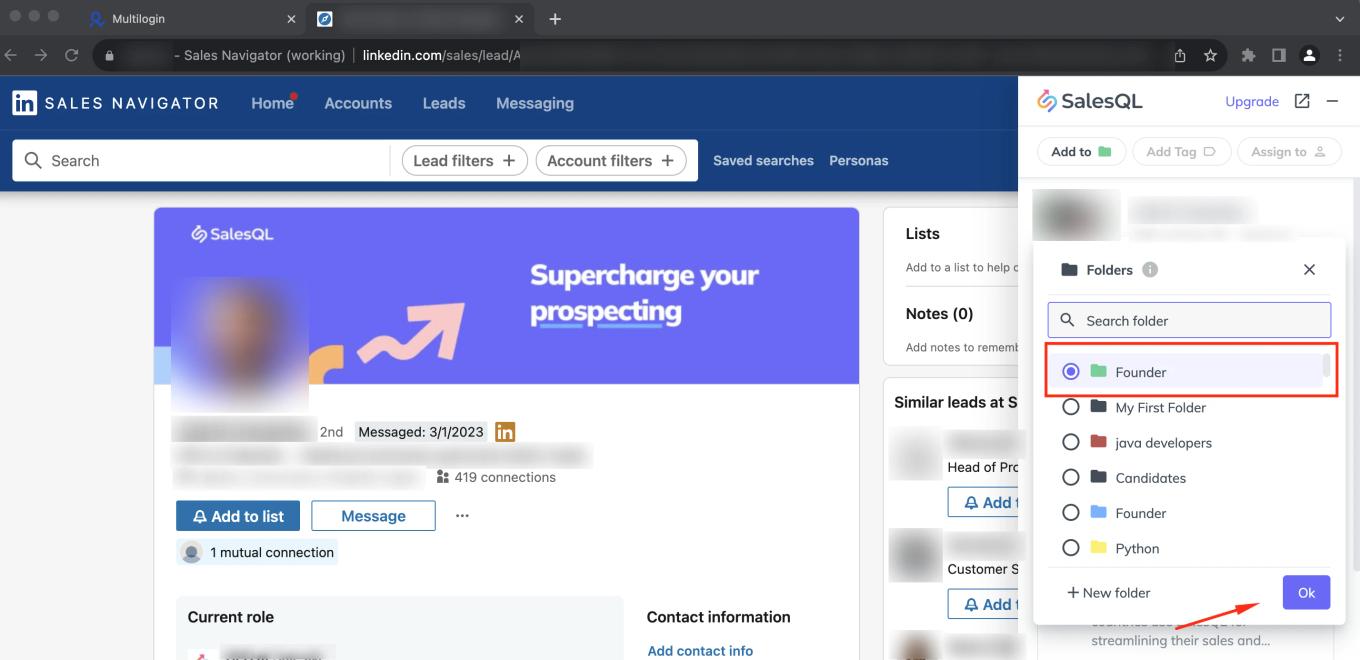
  1. Go to the profile of the contact you wish to add, and click on the extension icon. Next, select the folder to which you intend to send the contact.
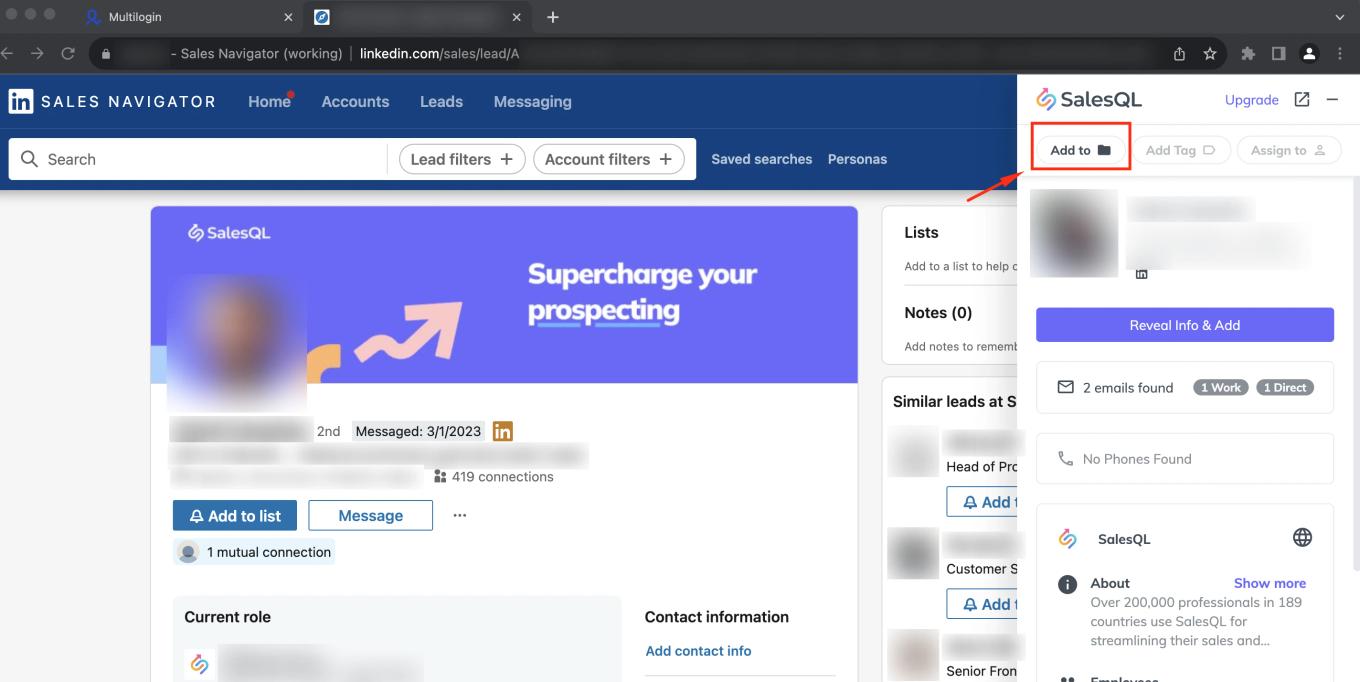
    SalesQL extension on a Sales Navigator lead profile with the "Add to" button highlighted
  2. In this case, “Founder”

    SalesQL folder list over a Sales Navigator profile with the "Founder" folder selected and the "Ok" button
  3. Now, that you have the folder selected, click on"Reveal info & Add" button.
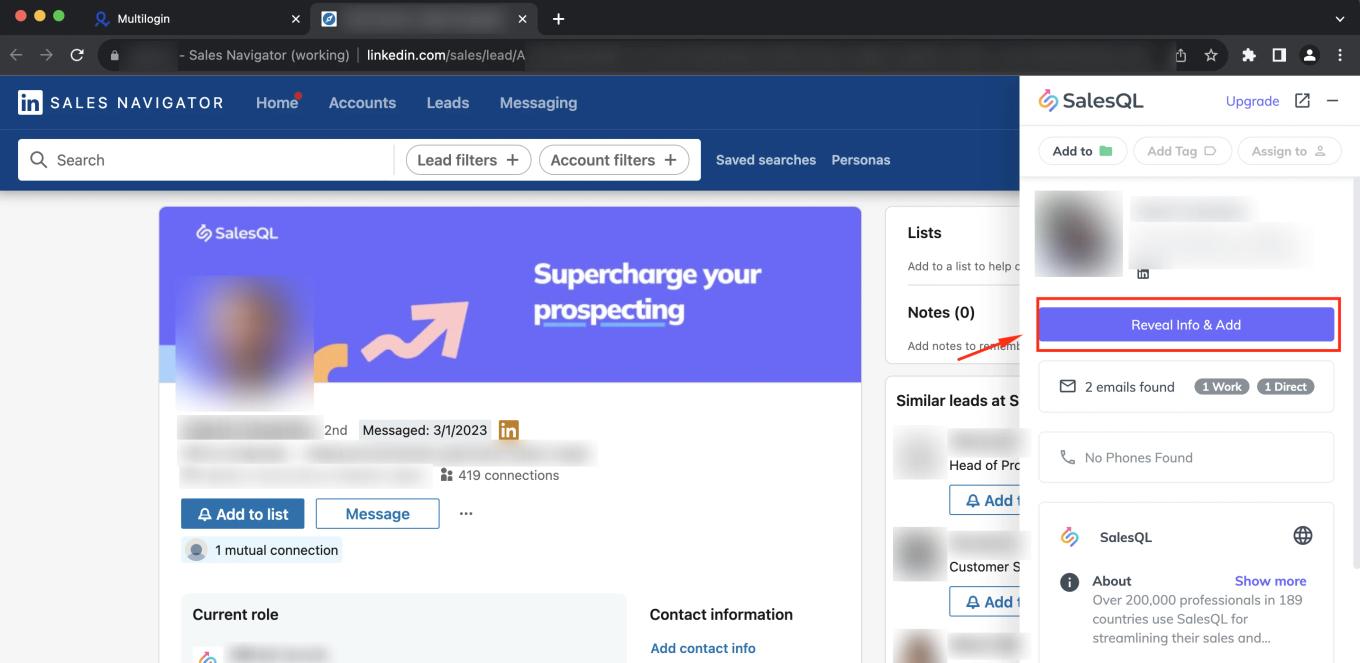
    SalesQL extension on a Sales Navigator profile with the "Reveal Info & Add" button highlighted
  4. For an easier way to locate the contact folder, simply click on "Current work folder."
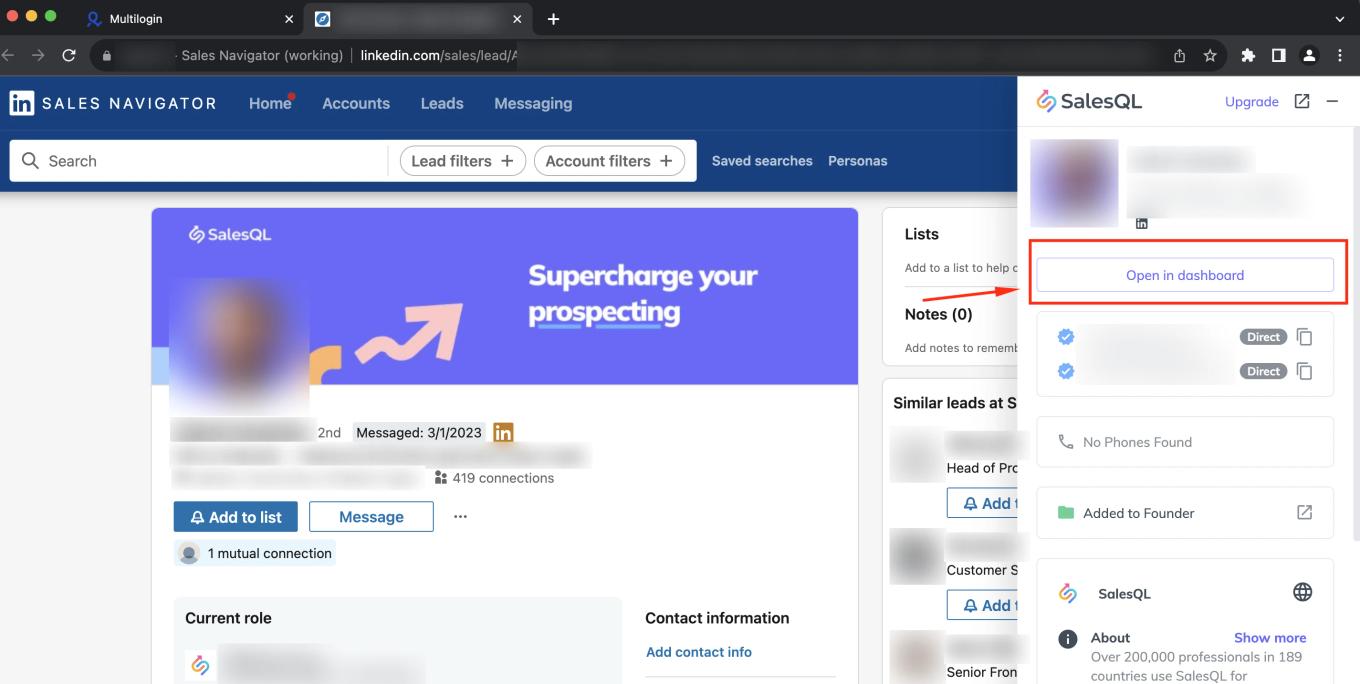
    SalesQL extension on Sales Navigator after revealing a contact, with the "Open in dashboard" button highlighted

    and it will redirect you directly to the folder showing the contact:
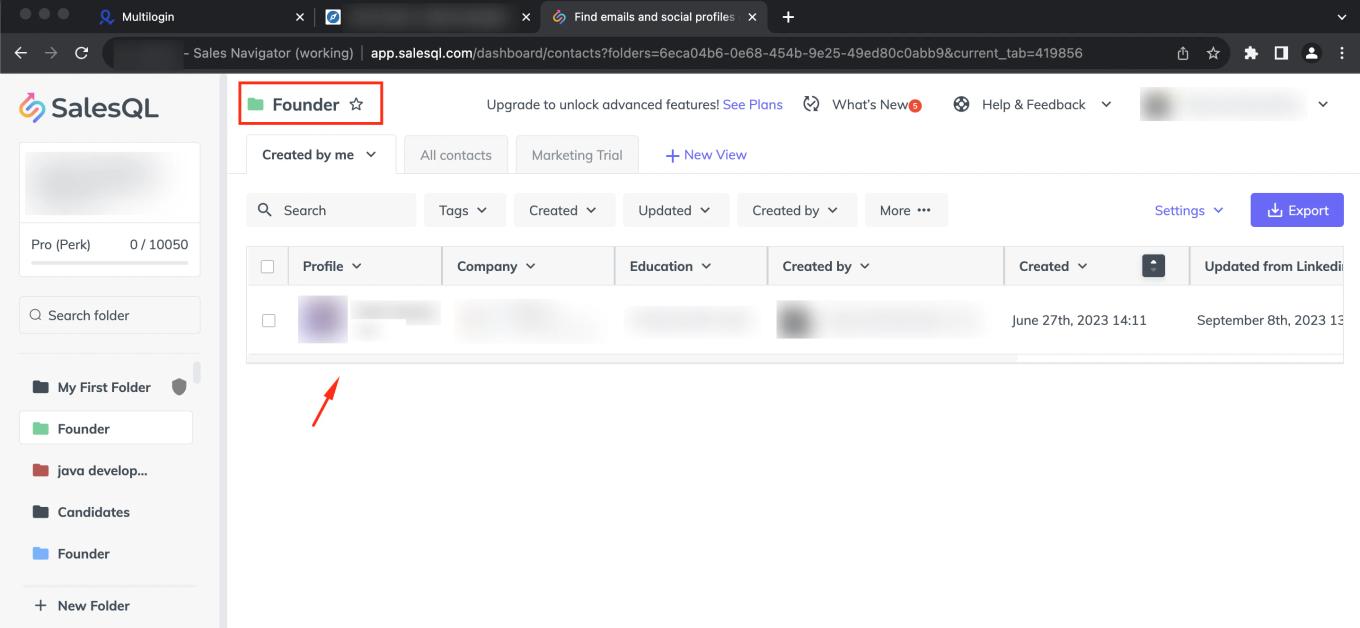
    SalesQL dashboard with the "Founder" folder open, showing the newly added contact in the list

📚 For further information on additional Sales Navigator features, please refer to this article: SalesQL Across Sales Navigator Bulk 📖🌐🔍

If you still have any questions, check out our Help Center.

More in Browser extension

See all 16 articles in Browser extension